In Part I, I covered general pros and cons of body armor, as well as considerations for when you and shouldn’t wear it. In this article I will cover what to look for when purchasing body armor.
Determine How Much Protection You Need/Want
The first step in purchasing armor is deciding how much protection you want to have. This will be largely determined by your anticipated opponent and what they use. If you’re mainly concerned about thugs who carry handguns along your daily commute, Lvl II or IIIA soft armor may be sufficient. If you’re thinking about strapping on a rifle to fight other men armed with rifles, you will need Lvl III or IV.
Lvl IIIA Soft armor can be worn under a jacket, but the trade-off is that it only stops pistol bullets.
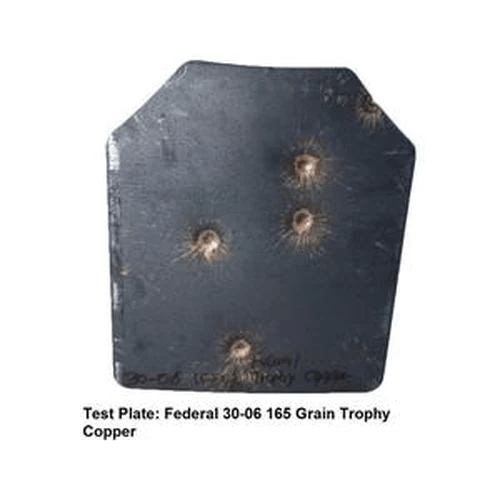
Ensure that the manufacturer has an official ballistic level rating from the National Institute of Justice (NIJ). This means that their armor has been submitted to the NIJ for testing and they have awarded that specific plate a rating based on how it held up in their unbiased tests. If you see plates listed as “NIJ equivalent“, that means that the plates are NOT properly tested, and you should stay away. The best sellers have their official NIJ test results publicly available on their websites.
If you’re looking at plates, the next question is how much coverage do you need/want? The minimum is a front-and-back plate combination. However, there are also side plates that you can get to protect the gaps under your armpits. If that wasn’t enough, there are many different shapes (or “cuts”) of front and back plates. This can be overwhelming for new buyers. All you need to know is this:
more coverage = better protection, less comfort, less mobility
less coverage = less protection, better comfort, better mobility
It is up to you to find the correct balance of benefits that fits your needs. I personally have never had a need for anything other than standard cut, multi-curve front and back plates.
Types of Plates
Let’s focus on Lvl III and IV plates. As I pointed out in Part I, the difference between the two is that Lvl IV is rated for up to armor-piercing 30.06, and Lvl III is only rated for most FMJ rifle rounds. The cost difference is not very much ($25-50 more per plate) between Lvl III and IV, and the weight difference is only about 1lb. This minor difference in price is , in my opinion, well worth the extra money. Sure, you could save $50-$100 by going with Lvl III, but how much is your life worth to you?
Another aspect of armor plates is the curvature. There are generally two types; single curve and multi-curve. Single curve plates are simpler to make and therefore cheaper. Multi-curve plates conform better to the shape of your body and are more comfortable to wear. But they are, of course, more expensive.
Wearing armor is uncomfortable enough, go for multi-curve if you can afford it.
Steel Armor
Beware of steel body armor. There are several makers of steel armor plates that insist that their product offers the same if not better protection than standard ceramic plates, don’t buy it. The following are reasons to buy ceramic plates instead of steel:
Most steel armor will, as advertised, stop armor piercing ammunition. However, M193 (55gr FMJ, the most common 5.56 load in existence) is known to punch holes in steel armor plates when fired from a 16-20″ barrel within 100yds. I say again, within 100yds, the most common round in America fired from the most common rifle in America consistently defeats steel armor. The science behind this is fascinating, and you can read more about it at this link. https://diamondage.org/2020/08/24/solving-a-mystery-why-is-m193-better-at-penetrating-steel-armor-plate-than-m855/
Even when steel armor stops a bullet, the round shatters into fragments called “spall”. This spall has to go somewhere, and that normally means your arms, neck, and chin. Some companies use a “anti-spall coating” that allegedly catches spall, but it is not nearly reliable enough for me to trust my life to it.
Where did the bullets go? Into your arms, neck, and face.
Steel armor weighs roughly 50% more than comparable ceramic plates.
In the 2010s, steel armor was about half the price of ceramic. This is no longer the case, and in some cases ceramic plates can cost the same or less than comparable steel plates.
You see why I strongly discourage steel body armor. It isn’t worth the money, the weight, or your life.
Plate Carriers
Once you get your armor plates, you will need a plate carrier to wear them on your body. There are countless options on the market, and I could not hope to discuss them all. I will, instead, leave you with a few general tips on what to look for.
Ensure that you get the right sized plate carrier for your plates. Front and back plates come in many different sizes, so make sure that your carrier will fit the ones you bought.
Ensure that you get the right sized plate carrier for your body. This should go without saying, but plate carriers are not one-size-fits-all. Measure yourself before you buy, just as if you were buying clothes.
Look for padded shoulder straps. This is more important than you think. No padding, no sale.
Avoid plastic buckles that bear a load. Plastic buckles are okay only if they’re on a strap that is also held down with velcro. If the buckle itself is under strain, it will creak loudly as you move in cold weather (and also become brittle).
When it comes to the cummerbund (the part that wraps around your stomach), velcro closure is better than buckles. With velcro tabs, you have a little bit of room to change the size of the waist without adjusting any straps or buckles. This is very helpful when you’re shedding or adding clothing layers, and you don’t need to adjust any straps to make your plate carrier fit. Elastic cummerbunds are also great for this.
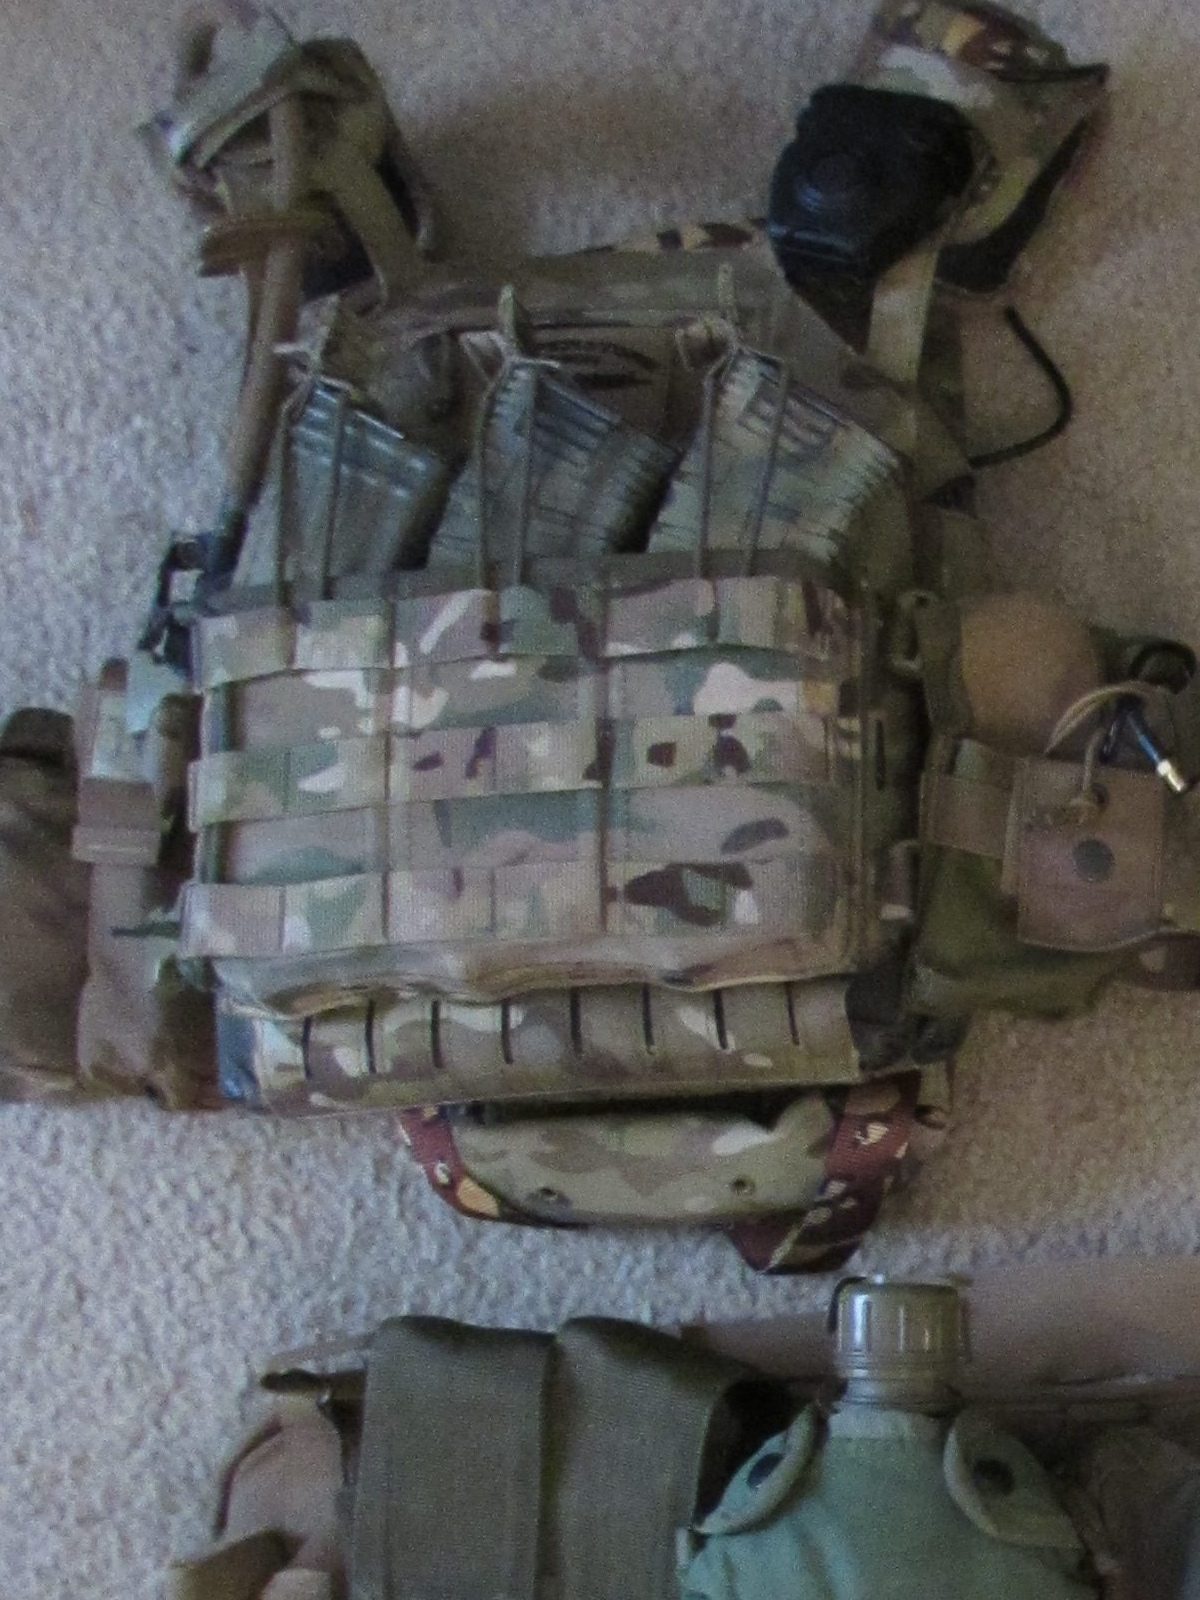
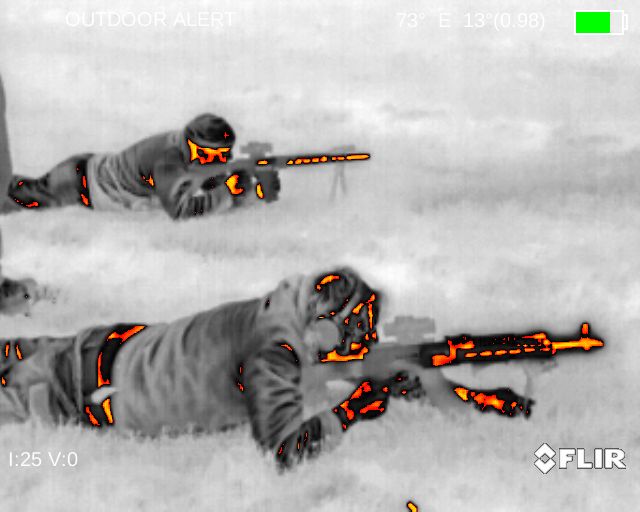
Ensure that the dye in the material is NIR compliant, meaning that it doesn’t reflect IR light and appear to glow when viewed through night vision. Many companies make affordable, cool-looking gear with non-NIR compliant materials (looking at you, 5.11 Tactical). This issue can be fixed, however, by spray painting the vest.
If your gear looks like this through night vision, you need to fix it with camo spray paint. More on this in a future video.
Summary
Hopefully by this point you have a better understanding of what your options are. While I couldn’t review every available armor product, the general guidelines laid out here will serve you well as you prepare to make this investment.
My personal recommendation is a set of ceramic, Lvl IV, multi-curve front and back plates from a reputable company. If you will be riding around in vehicles a lot, I’d also recommend investing in side plates. Of course, your mission and your budget will lead you to your own decision, and that’s perfectly fine. At least now, yours will be an informed decision.
Whatever you get, make sure you train in it. A lot. Part 3 will cover how to set up a plate carrier and how to properly wear your body armor, so stay tuned.
In this video I demonstrate how I paint my rifles. I do not claim to have invented this method, it was taught to me some time ago, and I am now sharing it with you.
This is my first time making video content, and I may make more in the future. Please bear with me, the quality will improve as I get used to my editing software.
Everyone who is new to the “tactical world” is immediately bombarded with a list of items that you “need to have” in order to survive combat. You “need” to have a light on your gun. You “need” to have the latest camo pattern. And, of course, you need to have armor. Body armor is a curious paradigm, because it is simultaneously useful and overrated. In this article I will lay out the pros and cons of wearing armor, how to use it effectively, and what to look for when purchasing your own.
Types of Armor
As with weapons, there are so many different kinds of armor on the market that it can be overwhelming at first. So I’ll start with a rough guide to define some terms. If you’re already familiar with the NIJ rating system, you can skip this section to the “Pros and Cons”.
The National Institute of Justice (NIJ) has a rating system for measuring the effectiveness of body armor. These ratings are broken down into “levels” rated to stop hits from certain types of bullets anywhere on the panel. The following is a brief summary of what each level can stop.
Lvl IIA: 9mm and .40 S&W
Lvl II: 9mm and .357 Magnum
Lvl: IIIA: .357 SIG, .44 Magnum (virtually all pistol calibers and loads)
Lvl III: Rifles (tested up to 147gr 7.62x51mm, aka M80 ball)
Lvl IV: Armor-piercing rifle ammo (up to black tip 30.06, aka M2 AP)
Lvl IIA through IIIA are “soft armor”, flexible panels. Lvl III and Lvl IV are “hard armor”, formed into plates that must be worn in a carrier. Ballistic helmets are normally Lvl IIIA. For more information, check out the National Institute of Justice website where they list all of their testing standards and processes in detail.
Pros and Cons of Armor
The immediate advantage of wearing armor is obvious; it stops bullets from entering the most critical parts of your body. The price you pay, however, is weight and comfort.
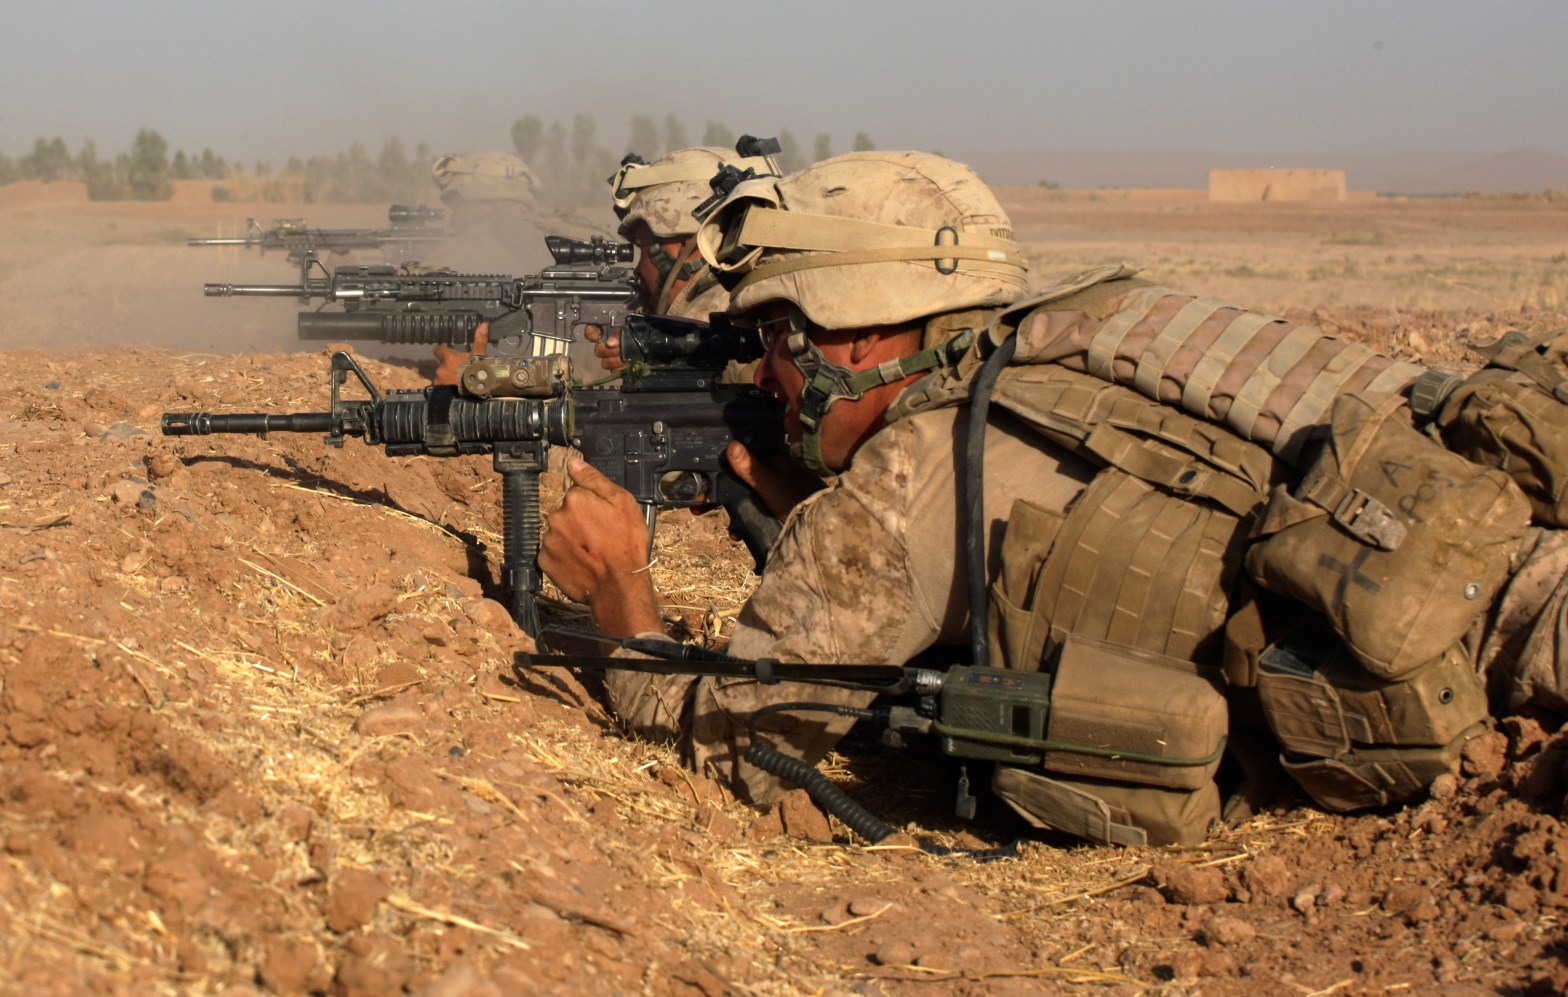
If you intend to fight men armed with rifles, you will need Lvl III or Lvl IV plates to stop incoming rounds. Front/back plates can weigh anywhere from 4-8 pounds each, meaning that you’re carrying an additional 8-16 pounds (even more if you wear side armor). Extra weight makes you slower and fatigues you faster.
It is important to note that armor doesn’t always keep you from becoming a casualty, it just keeps bullets from entering the most critical parts of your body. For example, a bullet may go through your arm as you’re holding up your weapon before the plate stops it from entering your chest. Wearing armor should not make you lazy with your use of cover, you should be just as cautious as you are without it.
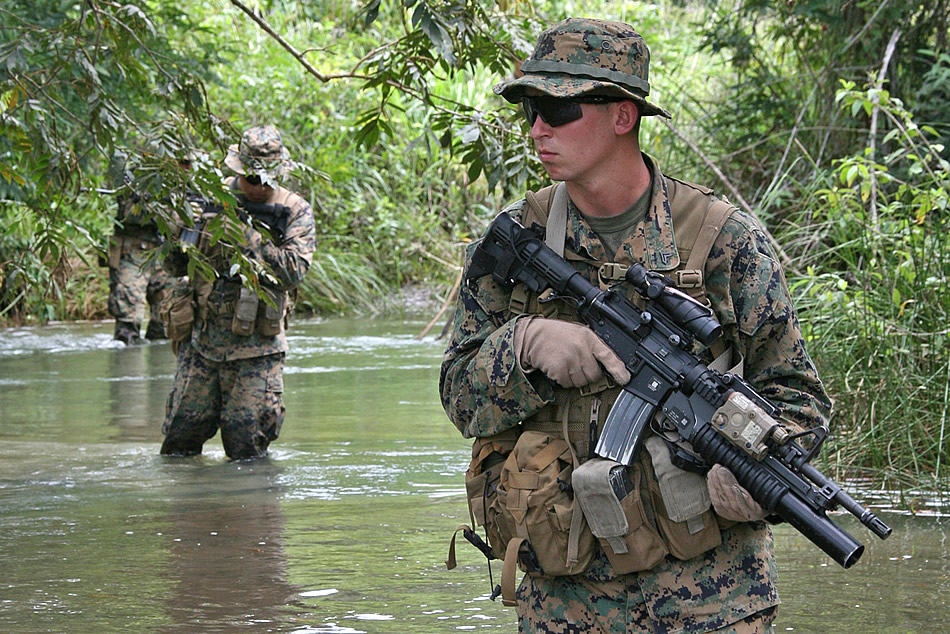
Another disadvantage of body armor is that it makes you sweat a LOT. Armored plates or panels trap in heat and don’t allow moisture to escape easily. You can expect to drink about double the amount of water on a patrol when you are wearing a plate carrier compared to wearing a chest rig or LBV.
When and When Not to Wear Armor
Many people, including some veterans, argue that “the military always wears armor, so you should too.” I will address this claim in two parts.
Not everyone in the military wears armor, I was in a specialized unit that was issued chest rigs in addition to our plate carriers. We chose which to use based on our mission.
Civilians are not in the military. They don’t have the same training, go on the same types of missions, or have the same resources as the army or Marine Corps. Civilians can (and should) make their own decisions for their training, missions, and gear.
Armor is beneficial, but the cons are substantial enough that it is not something we want to be wearing all the time. Here are some considerations to help you decide if body armor is right for you and your mission.
It is difficult to stalk while wearing armor. Walking bent over is VERY taxing with 30 pounds on your torso, especially if you haven’t practiced it.
Manning a static security post eliminates all cons for wearing armor other than discomfort, which you can live live with.
If you wish to conceal the fact that you are wearing armor, you may be restricted to soft armor underneath your clothes. Armor plates are extremely difficult to conceal due to their bulk. One time I concealed a plate carrier in winter by wearing it under a large coat, but was compromised when I bumped into somebody in a crowd and they felt my hard back plate.
Foot patrols can only carry so much weight. You will have to consider how far/long a patrol is and what else you must carry to determine if you can afford the 15-25lbs per man that armor costs. For example, I might wear armor on a 3-hour security patrol, but not on a 5-day recon patrol where I’m carrying my sustainment in a pack.
Mounted operations (in vehicles) are a good use for armor because you’re already sacrificing stealth for speed, so you’ll want all the protection you can get. An exception is if you’re only using vehicles for infiltration/insertion prior to a lengthy foot patrol.
If you are traveling in a small boat, consider that you may fall/jump out at some point and be compelled to swim. Armor may impede your ability to do so. There are ways to mitigate this (training, flotation devices, etc.), but you should test them ahead of time, i.e. BEFORE you trust your life to them. I have done a good amount of small boat insertion training, and never wore armor while doing it.
Summary
This has been a brief overview of body armor and the context in which it is useful. At this point you should have a good idea of what protection armor provides and enough information to determine if it is a good fit for your intended use. In Part II, I will cover how to properly wear armor, considerations for setting up a plate carrier, and what to look for when purchasing your own.
This page is a resource for “good enough” gear for someone looking to build a rifleman’s kit on a tight budget. I seek to list equipment that is reasonably affordable but also reliable and rugged enough to withstand real-world use. My goal is for you to use this list to fill in gaps in your kit so that you can be fully mission-ready for at least 3 days worth of operations as a rifleman, independent of any resupply.
I am fully aware that there is better equipment out there, and if you can afford it, by all means get higher quality gear. This list is so that someone with a $2,000 budget can fully equip themselves with a fighting load instead of buying, for example, a $1,700 rifle and a $300 optic with no ammo, water, or medical gear.
Full disclosure: I am an Amazon affiliate, and some of the equipment that I list here has affiliate hyperlinks embedded. If you click on these links and buy the gear, I may make a small commission on the sale. You pay exactly the same price for the item as you otherwise would, but by using my links you are supporting VSTAC at Amazon’s expense.
I recommend you use this list in conjunction with my article on what gear you should get in what order. This is a living document, and I will continue to update it as I find better recommendations. Total costs are at the bottom of the page.
Ammunition: ammoseek.com (Free search engine for online ammo sales. Click on your caliber and it lists the top 100 results of IN STOCK ammo sorted by cheapest per round. Updates every few minutes.) 1000rds ($450-$500)
Chemical treatment: Unscented household bleach (5% to 9% sodium hypochlorite) in a small bottle with dropper (2 drops per quart/liter, shake, and wait 30 minutes before drinking).
Sustainment Gear Capability: Rural patrolling, reconnaissance, or combat missions up to 3 days without resupply. Price: $343 Total Price: $1,605-$1,972
Force Multipliers Capability: See and fight at night, communicate with nearby teammates Price: $3,794 Total Price: $5,399-$5,766
This past week was the first Jäger Course. I’ve been looking forward to this class for a long time, and it was my great pleasure to finally teach it. Over the course of 5 days and 4 nights, 8 students and I lived out of our packs and slept under our tarp shelters. An aggressive and open-ended OPFOR kept the realism and immersion up in the latter half of the week.
Today I am writing an After-Action Review (AAR) of the equipment that I used on the course. 5 days in the field is a great way to figure out what does and doesn’t work with your gear, as my students found out.
Water
I carried 1.5 gallons (5.7 liters) of water. Most of it was in 1-qt canteens, 2 in my main pack and 2 on my belt. This worked very well because I was able to swap out empty canteens on my belt with full ones from the pack as needed between water resupply.
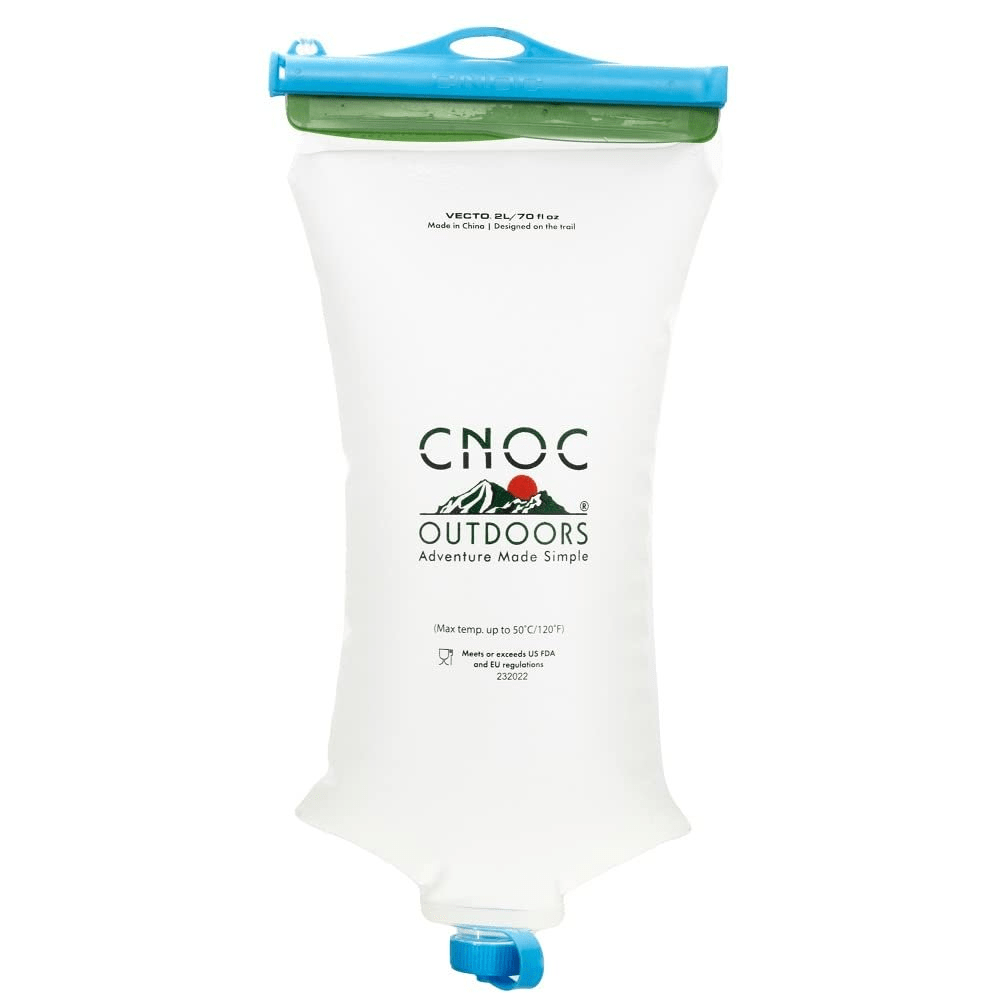
Water resupply worked very well, and my water treatment kit has undergone a couple of improvements since I last wrote about it. One of those improvements was investing in some CNOC Outdoors 2-liter squeeze bags to go with my Sawyer filter. These bags are tough enough to withstand up to 220 lbs of pressure, although I primarily used them to gravity-feed the filter. I carried 2 of them to resupply 2/3 of my water supply at once. In the future, I will carry 3 so I can fully top off my water even when bone dry.
I used field stripped MREs. They’re light, calorie-dense, and at the moment I happen to have a surplus of them. My main complaint was that there weren’t enough snacks that I could eat on the move, and the larger items required I had to eat all at once because they weren’t resealable. As the instructor, I had very little time to sit and enjoy a meal, so I mainly lived off of the snacks.
In time, I want to move away from relying on MREs and experiment with more commonly available items that I can pick up at a local store with maybe a little preparation at home. It doesn’t need to last 2 years, just 2 weeks will do if I can plan ahead and prepare for the patrol.
Shelter
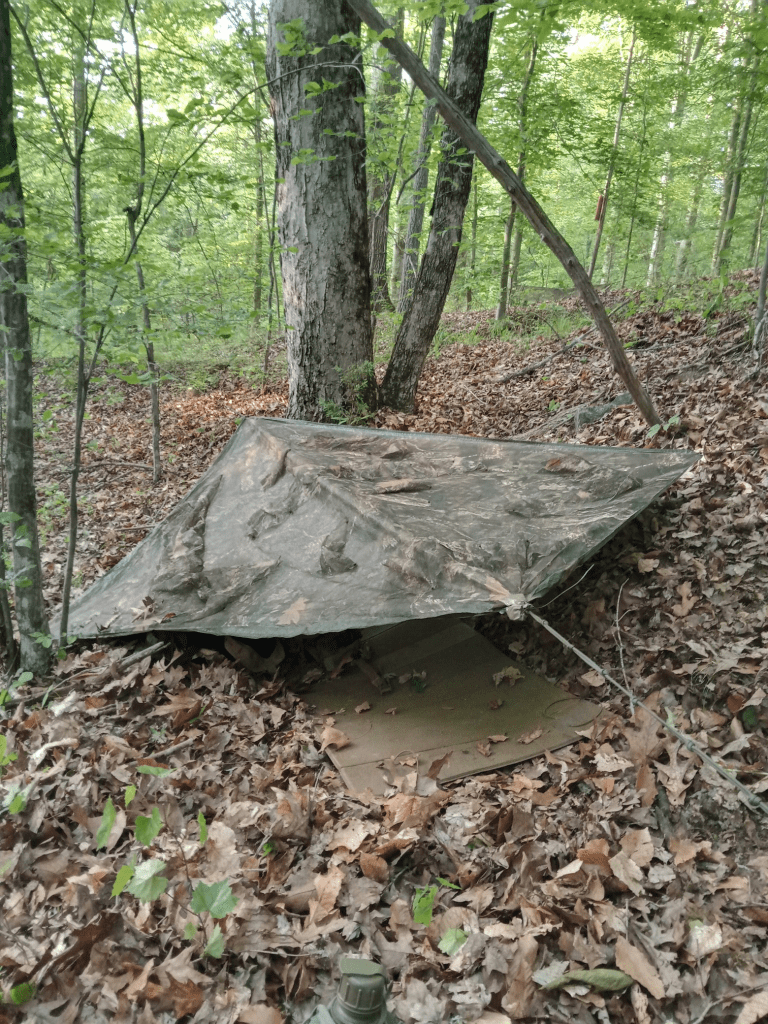
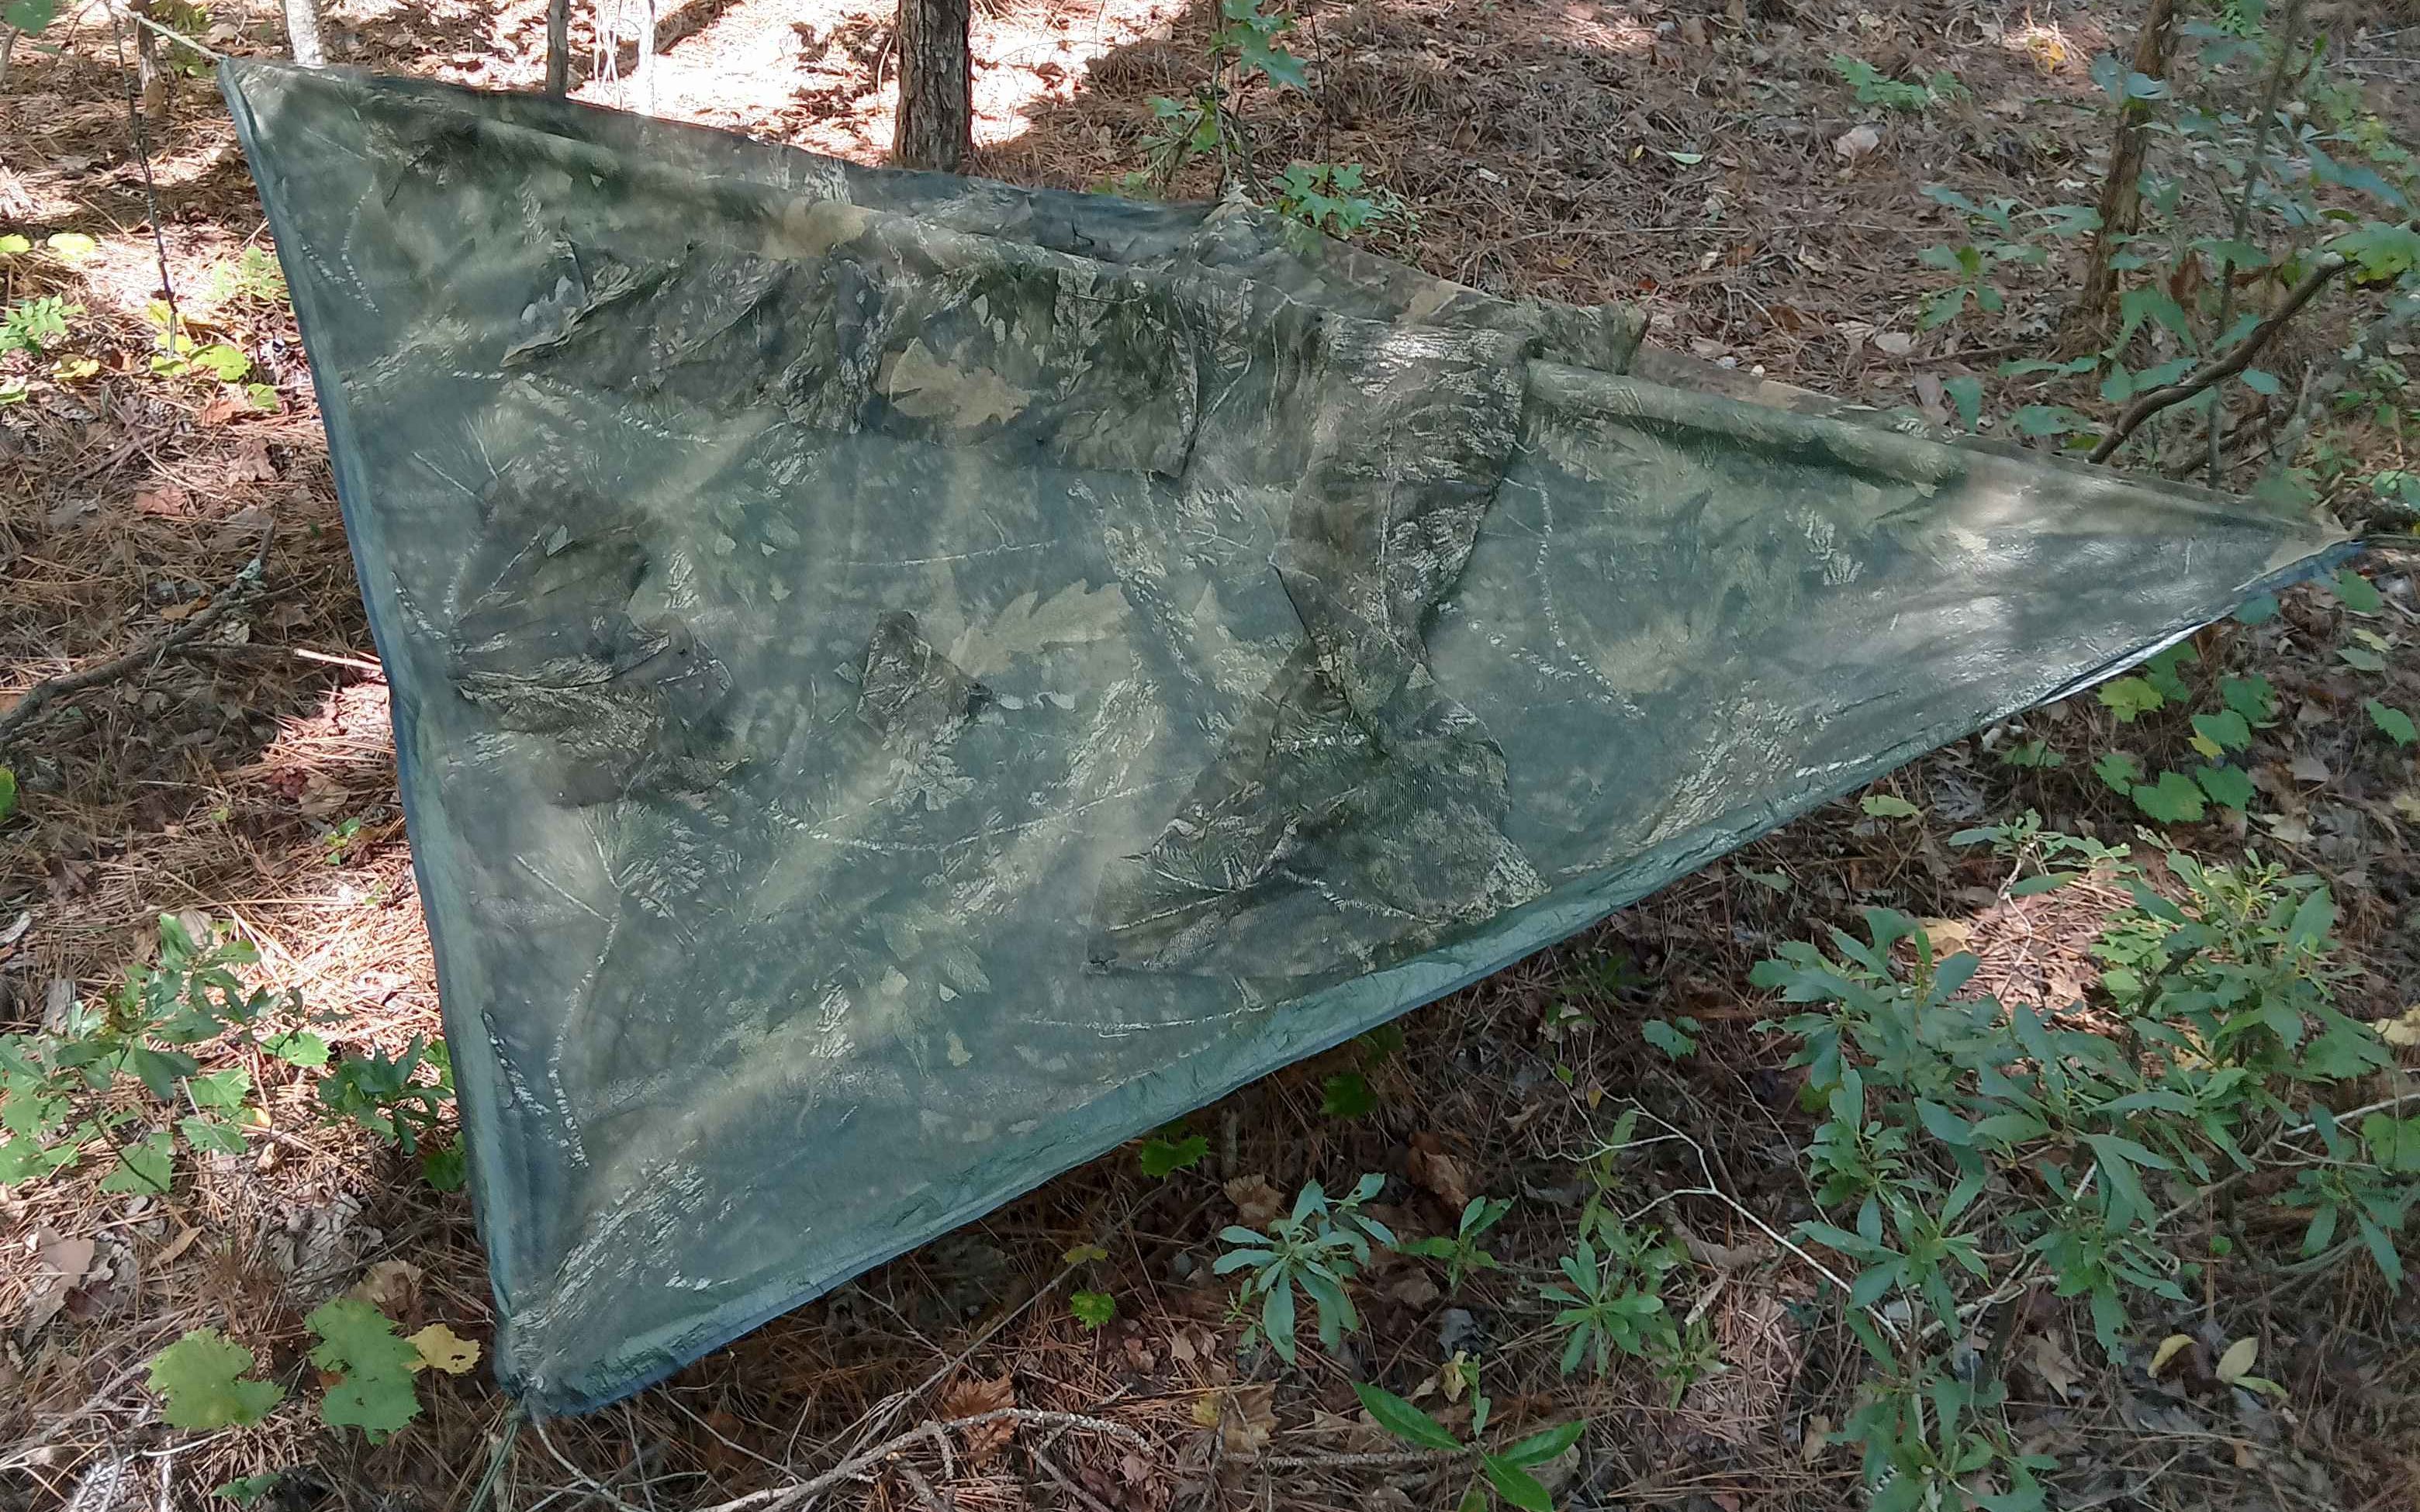
I slept under my Jäger Rig the whole time. I’ve been using this setup for a few years now, and it continues to perform just fine protecting me from the elements in summer here while also hiding me from thermal optics.
Joe Dolio, however, showed me up by bringing a Jäger Rig made from a thermal tarp with British DPM Camouflage, which worked much better than my solid green tarp. With some cheap walmart hunter’s mesh draped over it, his tarp seemed to vanish into the ground. I will be purchasing one in the near future.
My shelter (Left) and Joe’s Shelter (Right). Affiliate link to Joe’s tarp: https://amzn.to/3Ol1y7r
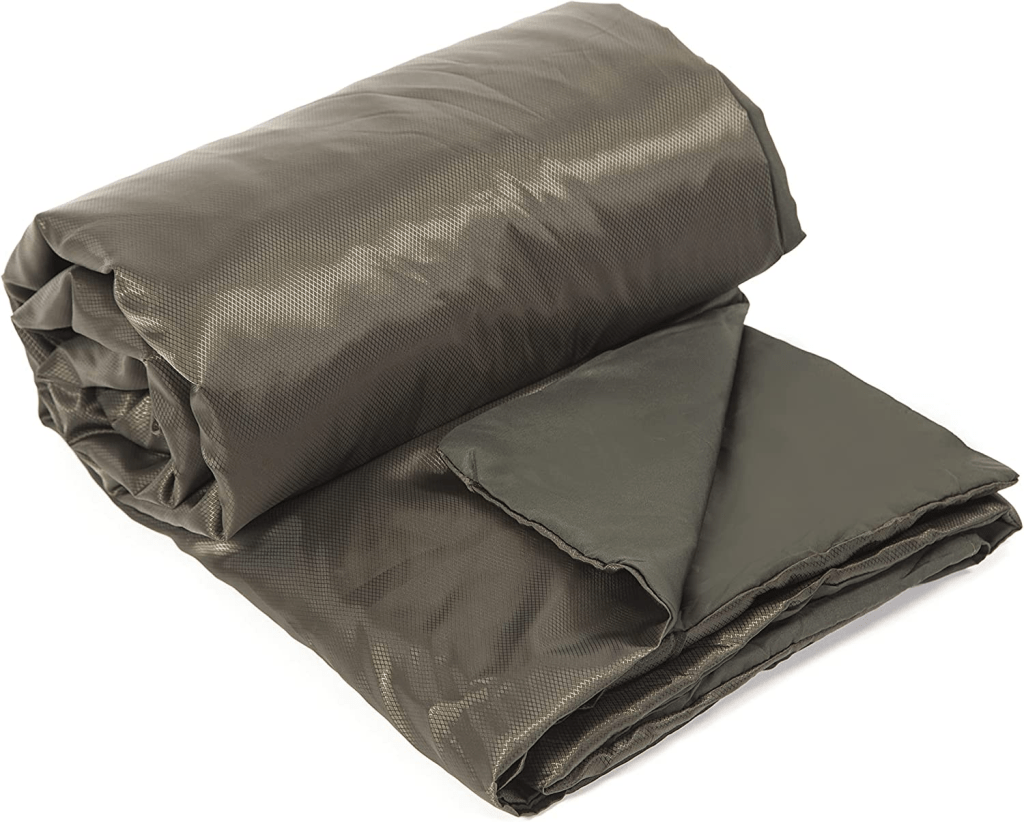
My sleeping bag, a snugpak jungle bag, worked very well. It got down to about 50 degrees Fahrenheit in the nights, and I was equally warm inside the bag and when using it unzipped as a blanket. Again, no surprise here. I’ve been using this bag for about 2 years now and it works very well in my area where it rarely gets below 40 degrees. The zippers broke about a year ago, however, so I’d recommend the Jungle Blanket instead of the Jungle Bag.
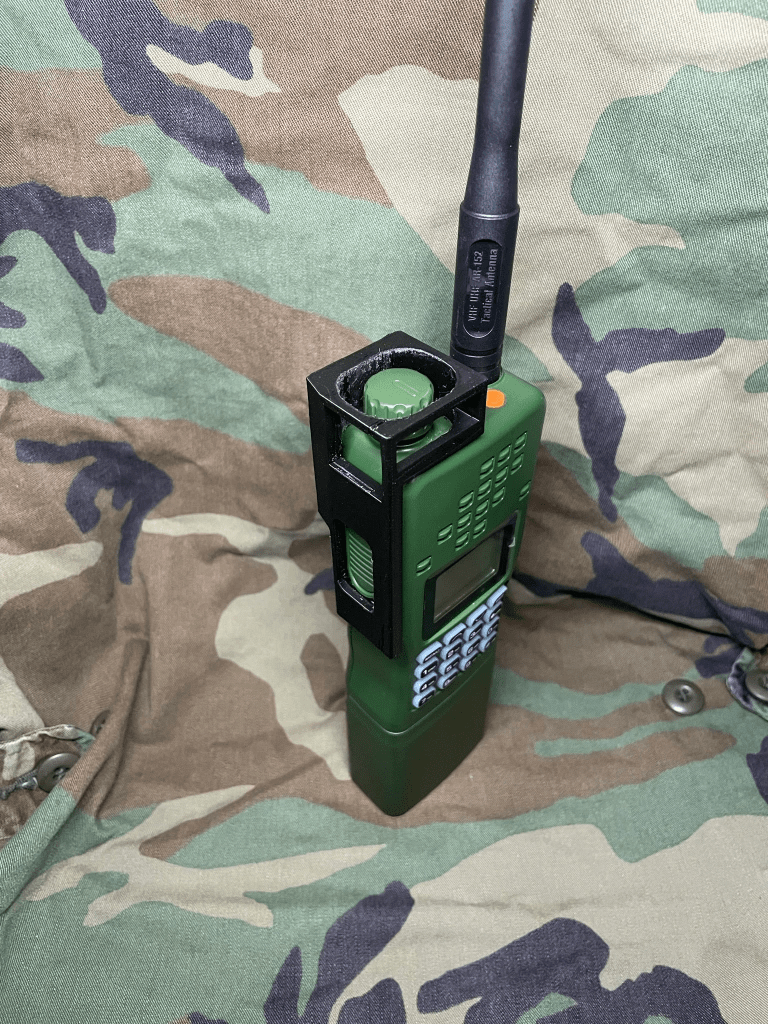
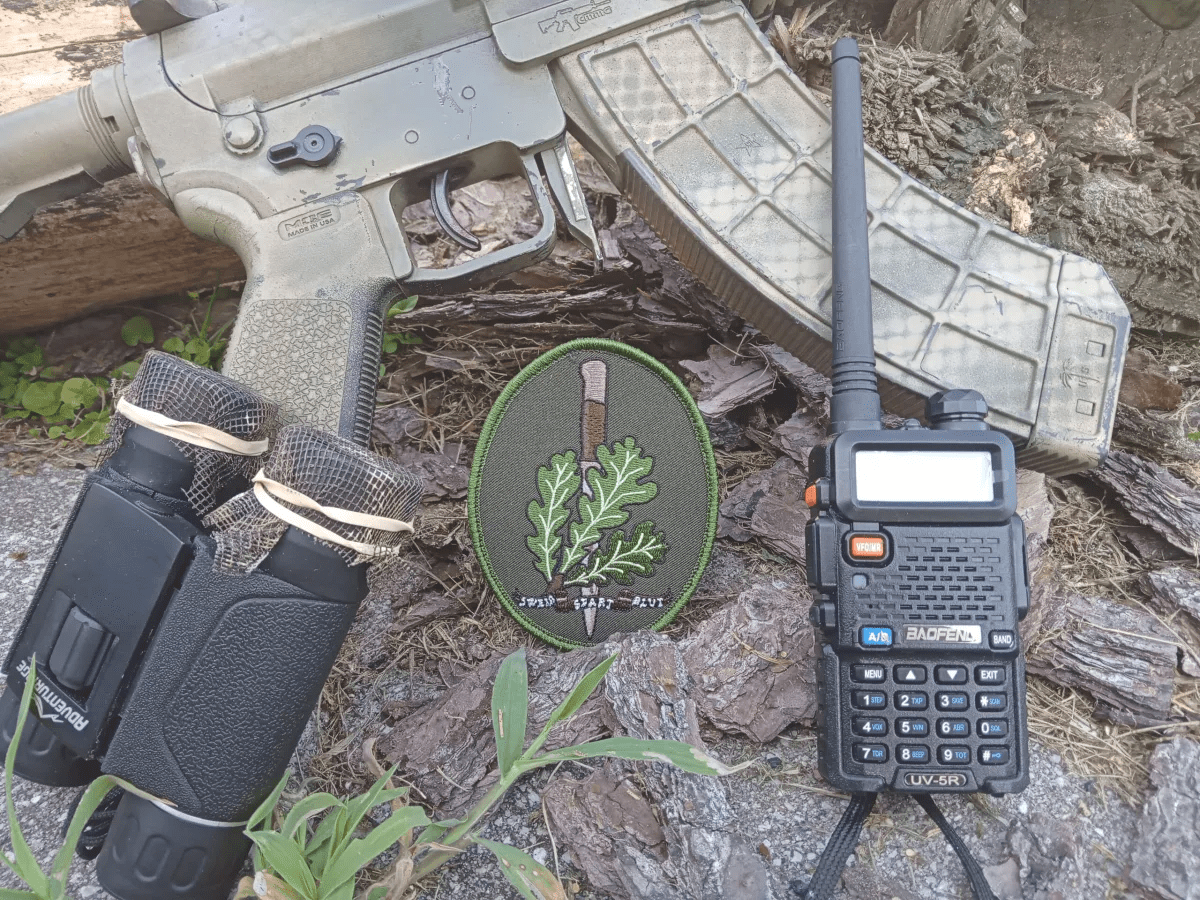
Although I normally use a Baofeng UV-9R on my kit, this time I used an AR-152 for exercise control. I have to say that I’m very impressed with it, and I originally only got one for my longer-range communications. However, given the impressive battery life, I may consider getting another one to replace the UV-9R as my primary tactical radio. My AR-152 was switched on for almost the entire 5 days, and the battery wasn’t even close to run down.
Also of note is the exoskeleton I used from Bolt Boy Ballistic Co. It stayed on the radio the whole time, bouncing around in my cargo pocket. I never had an accidental adjustment of the volume knob or hot mic from the PTT.
A must-have for the AR-152.
Packs
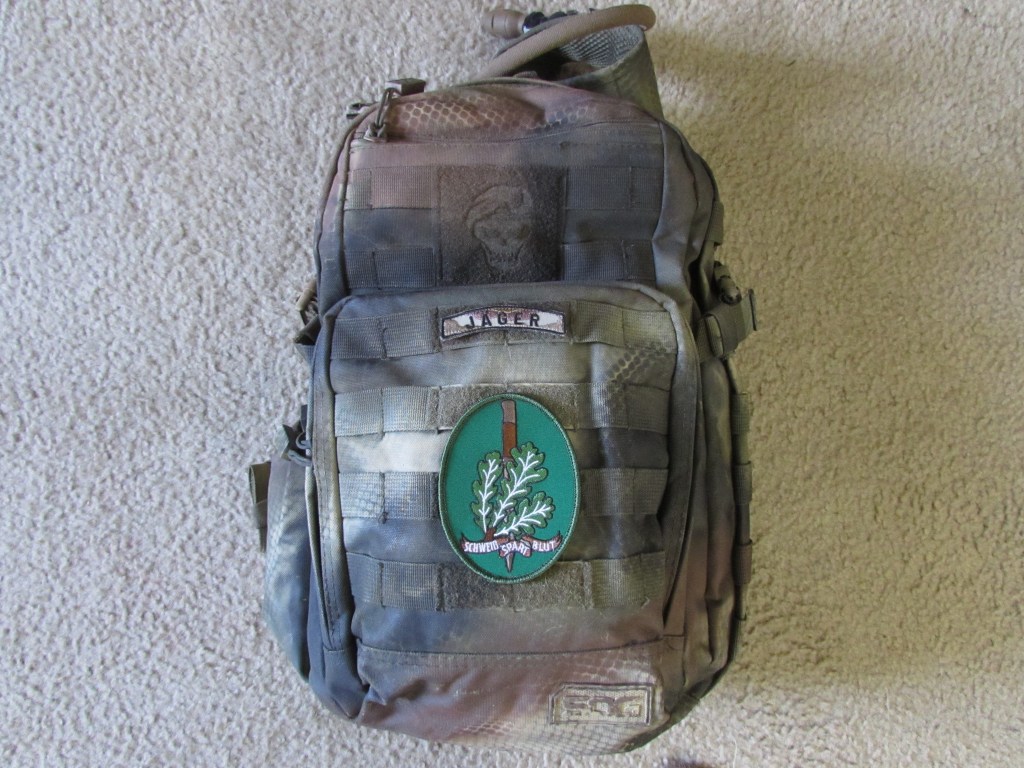
My main pack was a Teton Scout 3400 55-liter and my assault pack was an SOG Ninja. I used these packs not because they’re the best products available (I have much nicer packs), but because I wanted to test them as “budget options” that are still rugged enough for serious use. Together, these two packs cost about $115 on Amazon, and after several ruck runs, short trips, and now the Jäger Course, I can say that they do indeed hold up to field conditions.
The SOG Ninja is a 20-liter day pack which can fit under the lid of the Teton Scout, or inside of the main compartment for a less conspicuous look. See my 2023 Jäger Kit article for what I put in each pack.
My SOG Ninja assault pack (with spray paint camo for NIR-compliance). Affiliate link: https://amzn.to/42QFl5B
My only complaint about these packs is that they are not NIR compliant (meaning that they glow white under night vision). This can be easily fixed, however, with camouflage spray paint or an NIR-compliant pack cover.
Bottom line: These packs worked well for me and I personally recommend them for someone who is starting out and needs to assemble a complete kit on a tight budget. Are they “just as good” as brands like Crossfire, Mystery Ranch, or Eberlestock? No, but they’re rugged enough, and for $115 you’re still getting a lot of capability for less than half the price.
Summary
This has been a brief summary of my findings regarding my gear during the Jäger Course last week. There were other things I noted as well, but these are the biggest take-aways that I had at the end of the week. 5 days in the field is a great way to test yourself and your equipment, as my students found out. This first Jäger Course was a blast, and I’ll definitely be running more of them in the future as I am able.
Last year, I wrote a series of articles on my “Jäger Kit”, the equipment that I carry for light infantry operations and extended patrolling. However, one’s equipment is a constant evolution as you find things that work better for you, and I am no exception. And with the Jäger Course coming up in a month, I thought it would be appropriate for me to make an updated article about my gear.
Full disclosure: I am now an Amazon affiliate, and some of the equipment that I list here will have affiliate hyperlinks embedded. If you click on these links and buy the gear, I may make a small commission on the sale. You pay exactly the same price for the item as you otherwise would, but by using my links you are supporting VSTAC at Amazon’s expense.
Legal speak out of the way, let’s look at some gear.
I’m not winning any cool guy competitions any time soon. But it works and that’s all I care about.
In it’s current state, my kit is divided into my belt, chest rig, assault pack, and main pack. We’ll look at each section and I’ll break down what I carry, what has changed, and why I changed it.
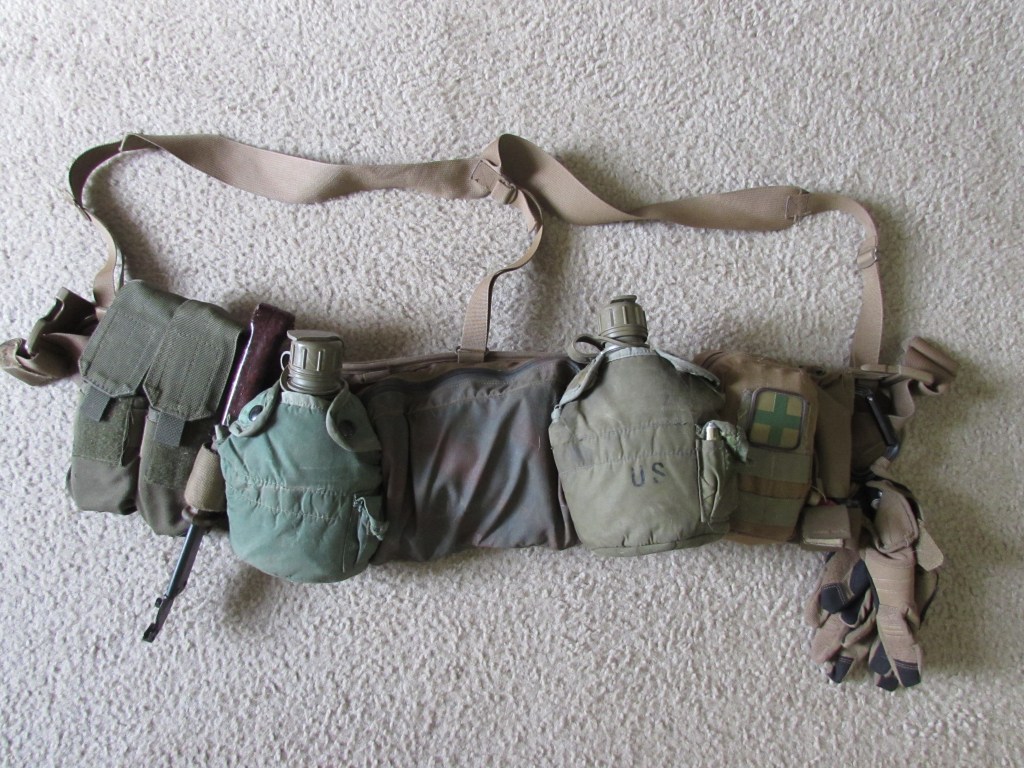
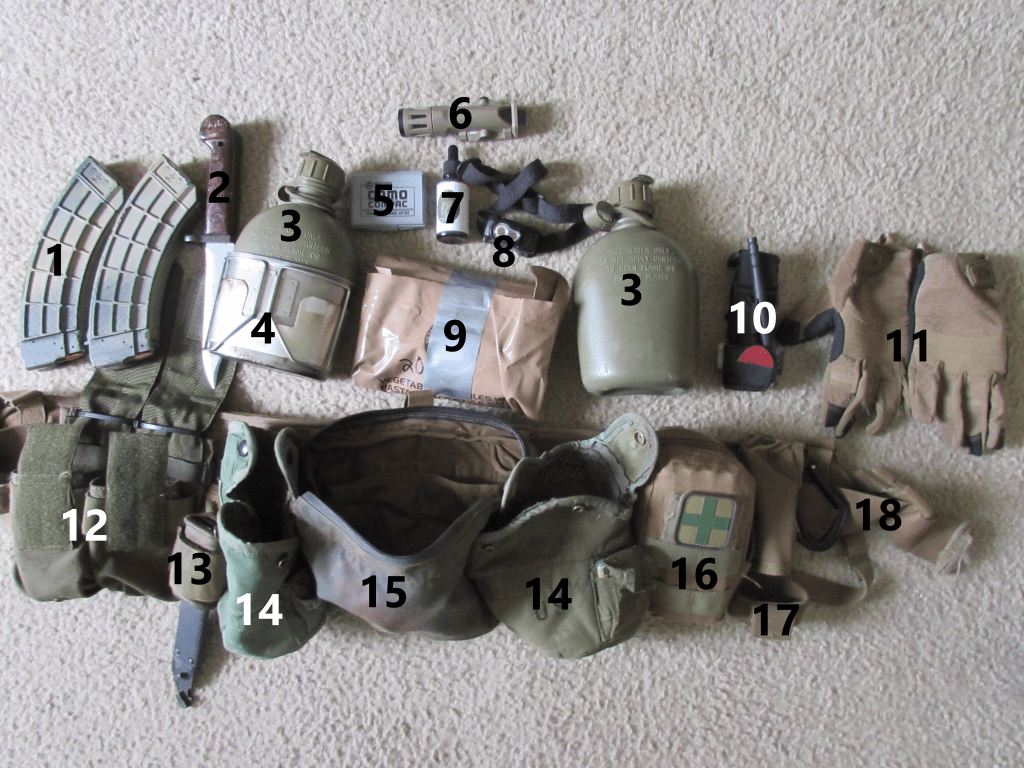
War Belt
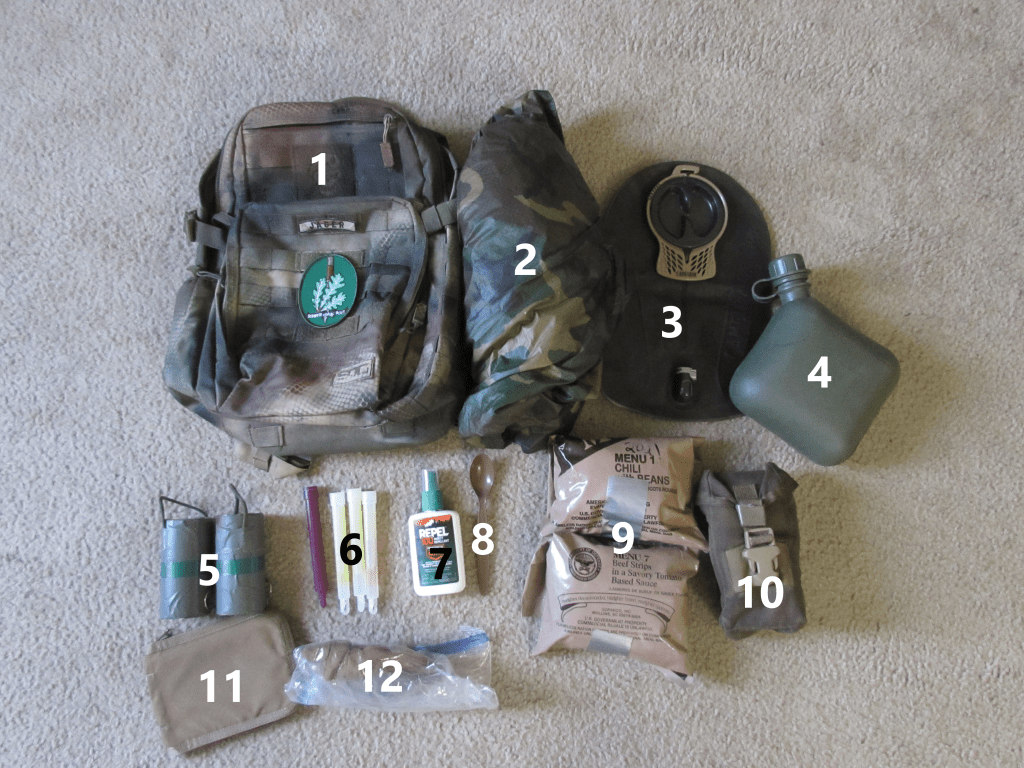
1. 2x AK magazines 2.AKM Bayonet. I replaced my Ka-Bar with the AK bayonet because I want the option of fixing the bayonet on my rifle, and this bayonet can attach to the sheath and function as wire cutters. 3. 2x canteens. A common trend in all of my personal AARs from last year was that I never had enough water. In the heat of summer when I dropped my pack for a mission, I could drink my full 2-liter camelback after about an hour of patrolling, I was sweating so much. Thus, I felt the need to carry more water on my combat gear, and added the canteens. 4.Canteen cup and stove. I had this in my pack anyway, and only moved it to the belt when I put the canteen pouches there. It fits over the canteen and takes up virtually no space, and is very useful when I want hot coffee or gatorade. Never use gatorade powder in a canteen or camelback. It’s almost impossible to clean, and attracts bacteria and mold. In a camelback, it will destroy the anti-microbial lining that keeps mold at bay. 5.Camouflage face paint 6.Inforce WML-X weapon light. I carry this on the off chance that I may need to clear a structure, and its QD attachment allows me to put it on and take it off my rifle at will. I leave it off so that I don’t accidentally trigger it on a patrol, which could be fatal. 7. Bleach bottle with dropper. This is a part of my water purification kit. I keep it on my belt in case I am away from my main pack and must purify water without my filter. Iodine tablets or tincture would work as well, but the bleach is much more commonly available. 2 drops per quart with a 30-minute wait. 8.Headlamp. I really like this model, it defaults to the red light and takes deliberate action (holding down the button after red light is on) to activate the white light. My only complaint is that it takes AAAs, and nothing else in my kit does. This adds one more type of battery that I must carry spares of. 9. Field stripped MRE, or 1/2 day’s rations. 10.CAT Tourniquet. I always recommend carrying at least 2, with at least one accessible with either hand. My second one is on my chest rig. 11.511 Tactical gloves. I like these because they’re breathable and have leather to protect my hands from a hot gun barrel/suppressor, as well as protecting my hands from thorns. 12.Blackhawk double M4 mag pouches. I like these because they can hold any rifle ammo I own. as configured, I can carry 4x AR mags OR 2x AK mags OR 2x AR-10 mags OR 12x rounds of .50 BMG for my AMR. 13.AK Bayonet sheath and homemade frog 14. 2x ALICE canteen pouches. Not that they’re better than MOLLE pouches, they’re just what I have and they work. 15. FILBE Assault Pouch. This replaced my MOLLE II buttpack because, with the addition of the canteens, the belt was too heavy and bulky. I moved some of the contents to my assault pack, and needed a smaller pouch. The FILBE Assault Pouch is very low profile and still holds items 5-9 comfortably. 16. IFAK. I chose a smaller pouch because I wanted to reduce bulk on the belt. It still holds all the same stuff, but only takes up 2 MOLLE Columns instead of 3. 17.Tourniquet pouch. Mine is inverted so that my chest rig or plate carrier don’t get in the way when I pull out the tourniquet. 18. The belt itself, a USMC MOLLE War Belt with suspenders.
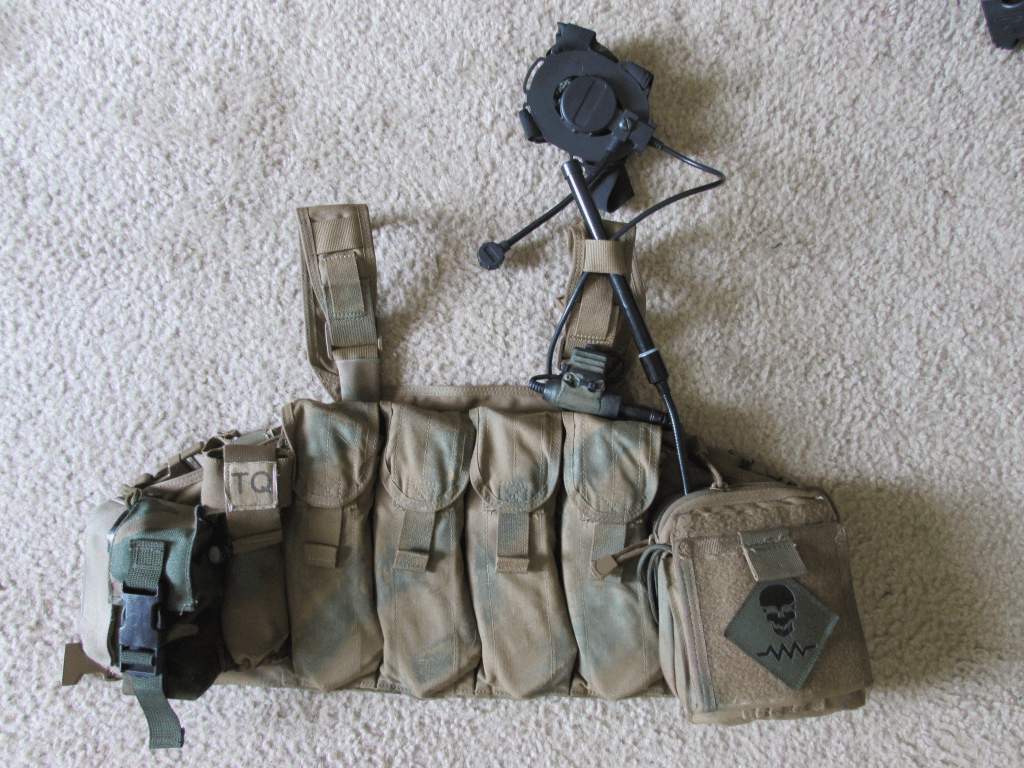
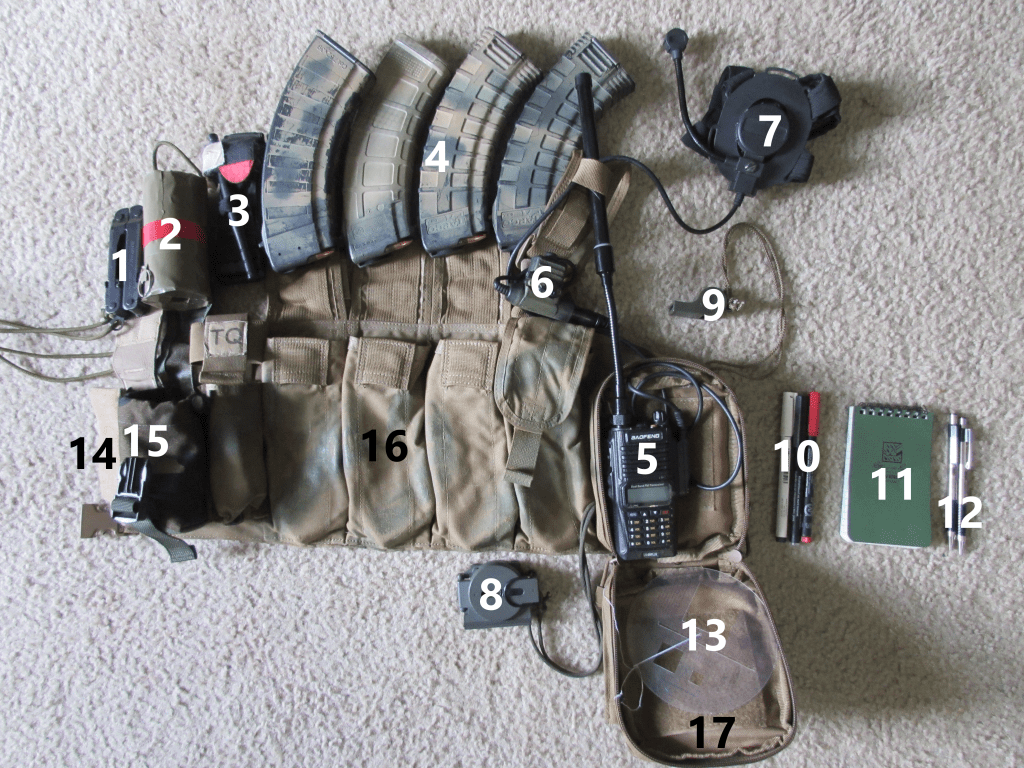
Chest Rig
1. Leatherman multitool. Note that it’s dummy corded to the chest rig. I’ve lost too many of these things in the past. 2.EG-18X Smoke Grenade, ruggedized with duct tape and marked with the color. See my article on tactical smoke employment. 3. CAT Tourniquet. I always recommend carrying at least 2, with at least one accessible with either hand. My second one is on my belt. 4. 4x AK magazines 5.Baofeng UV-9R radio. This is my personal favorite so far for a tactical radio that I wear on my kit because it is waterproof, but more importantly has a much better connection to the headset that screws in and doesn’t come loose like the 2-pin Kenwood connectors. I just recently purchased an AR-152, but I haven’t played with it too much yet. 6.PTT 7.Bowman-style headset. I love this option because it is comfortable, doesn’t make my ears sweat, doesn’t block my natural hearing, and doesn’t take extra batteries. And since it’s a headset and not a handset, I never miss a transmission that my radio receives due to loud noise around me (i.e. gunfire). 8.Lensatic Compass 9.Signal Whistle 10.Map pens and eraser 11.Rite-in-the-Rain notebook 12. Zebra ball-point pens. The Rite-in-the-Rain pens are crap, but these pens I have confirmed will write while under a running faucet. I have 2 because in case I lose or break one. 13.Protractor 14. Leatherman pouch 15. Smoke grenade pouch 16. The chest rig itself, a custom Minuteman-4 made by UW Gear. This is a massive step up from the modified chicom Type 56 that I had been using. 17.Condor map pouch (as I call it, the “Team Leader Pouch”). Read my review of this pouch here.
Assault Pack
1.SOG Ninja Assault Pack. I am still in the process of testing this pack for durability, so I cannot fully recommend it yet. I will post a review of it after the May Jäger Course. 2. USGI surplus poncho 3. 3-liter camelback bladder and hose 4.USGI 2-qt canteen. I do not normally fill the camelback bladder until I am wearing the assault pack by itself, as the bladder is prone to popping. When the pack is stowed or carried in my main pack, I leave my water in this collapsible canteen which will never pop. When I leave my main pack in the patrol base and put on my assault pack, then I fill the bladder from the canteen, which collapses and rolls up. 5. 2x extra EG-18X Smoke Grenades, ruggedized with duct tape and marked with the color. 6.Chemlights. As per my team’s SOP, we each carry 3x green and 3x red at a minimum. I also have 1x IR chemlight for an additional signalling option. My red chemlights are in my IFAK. 7.100% Deet Bug Spray. This is the only stuff that works in the coastal Carolina swamps, besides permethrin. 8. MRE Spoon. I carry one of these in the pack so that I don’t have to carry one in every MRE. It’s not much, but every little bit of weight savings counts. 9. 2x field stripped MREs, or 1 day’s rations. 10.USMC RCO pouch containing my night vision and thermal (Gen3 Photonis WP PVS-14 and a FLIR Breach) 11.Rite-in-the-Rain notepad with cover and 2x Zebra pens. 12. Beanie hat, neck gaiter, and warm gloves in a ziploc bag. This is a seasonal item, and will be removed from the pack in a week or so as the weather warms up.
As some may remember, I previously used only one pack, a FILBE Assault Pack. I decided to switch to a 2-pack system consisting of an assault pack and a main pack for the following reasons:
While my previous pack system worked and did sustain me for up to a week, it had zero room left over. I want my pack to have extra space for mission-specific items such as radios, extra ammunition, STANO gear, etc.
I had already been doing a 2-pack system, but I was using my butt pack in place of the assault pack. With the addition of 2 canteens onto my belt, the belt became overly bulky and heavy. So I removed some items from my belt and put them in a small 20 liter assault pack, which I carry any time I am away from my main pack.
Main Pack
All this weighs 42lbs, with water in the canteens. Not including my belt and chest rig.
1. Assault pack. As seen in the top photo, this straps to the top of the pack under the lid nicely. It also fits inside the main compartment if I wanted to look like an inconspicuous backpacker. 2. Silky Saw. This saw is very lightweight and is excellent for cutting small branches to clear a field of fire, or roots when digging a fighting position. 3.USGI E-tool (folding shovel). Essential for many tasks in or around a patrol base. 4. 4x field stripped MREs, or 2 days rations. Combined with the contents of the assault pack and my belt, I carry 3.5 days rations all together. There is extra space in the pack for more if the mission requires it, but this is what I have packed on a normal basis. 5. 2-step water treatment kit. This contains a Sawyer Mini filter, 2x 2-liter squeeze bags, a Steripen Ultra UV purifier, and a small funnel to pour water into canteens. I switched to a pouch instead of the 1-liter Nalgene that I had been using because it is easier to use and more compact. 6.Jäger Rig, shelter and thermal camouflage. 7.Sleeping pad 8. Pack cover. This one is in Flektarn made by Mil-Tec. I recently bought it but was disappointed to discover that, through night vision, it looks like a great white blob. For this reason, I can’t recommend this model. I will use it to waterproof my pack until I can find a suitable replacement. 9.Camouflage mesh. When draped over the camouflage pack cover, it makes my pack damn near vanish into the forest floor. 10. Sleeping bag in a waterproof bag. The bag is a Snugpak Jungle Bag. It is in a MACS sack waterproofing bag because I learned the hard way that the Snugpak stuff sack is NOT waterproof. 11.Skivvy Roll in a waterproof bag 12. The pack itself, a Teton Sports Scout 55L. Boltboy and I have been using these packs for a couple of months, and we’re pretty happy with them so far. Enough space for what we want to carry with room left over, rugged enough, very comfortable, and very affordable at $89. It has the added advantage of not looking overtly tactical if we decide that we want to look like harmless backpackers. 13. Non-reflective duct tape 14. Weapon cleaning kit (cleaning rods, CLP, AP brush, bore snake, and a rag). This had previously been in my buttpack. I moved it to my main pack because the only time I would do weapon maintenance is in a patrol base anyway, so it made sense to save weight and space on my fighting load. 15. My “fix-it kit”, 50ft of paracord wrapped around a pack of 12″ zip ties. Combined with the duct tape, I can use this to fix almost any gear failures in the field. 16. Medical Kit. This has some extra trauma supplies and a “boo-boo kit” containing band-aids, antiseptic, and moleskin for non-emergency aid. 17. 2x canteens 18. Hygiene kit containing toothbrush, toothpaste, deodorant, a silver-infused microfiber cloth, razor, and hand sanitizer.
The intent for the 2-pack system is for me to carry the main pack into the field with me, stash it at a patrol base or ORP, and take my assault pack with me when I go on a mission. Any supplies I use from my fighting load or assault pack, I resupply from my main pack when I return to it. That is why I carry my spare water in canteens, so I can swap them out with the ones on my belt. If I use my smoke grenade, I replace it with one from my assault pack. If I ate the MREs in my assault pack, I replace them with the ones from my main pack. I may also carry extra rifle magazines in the main pack. This ensures that my gear remains at the highest possible level of readiness.
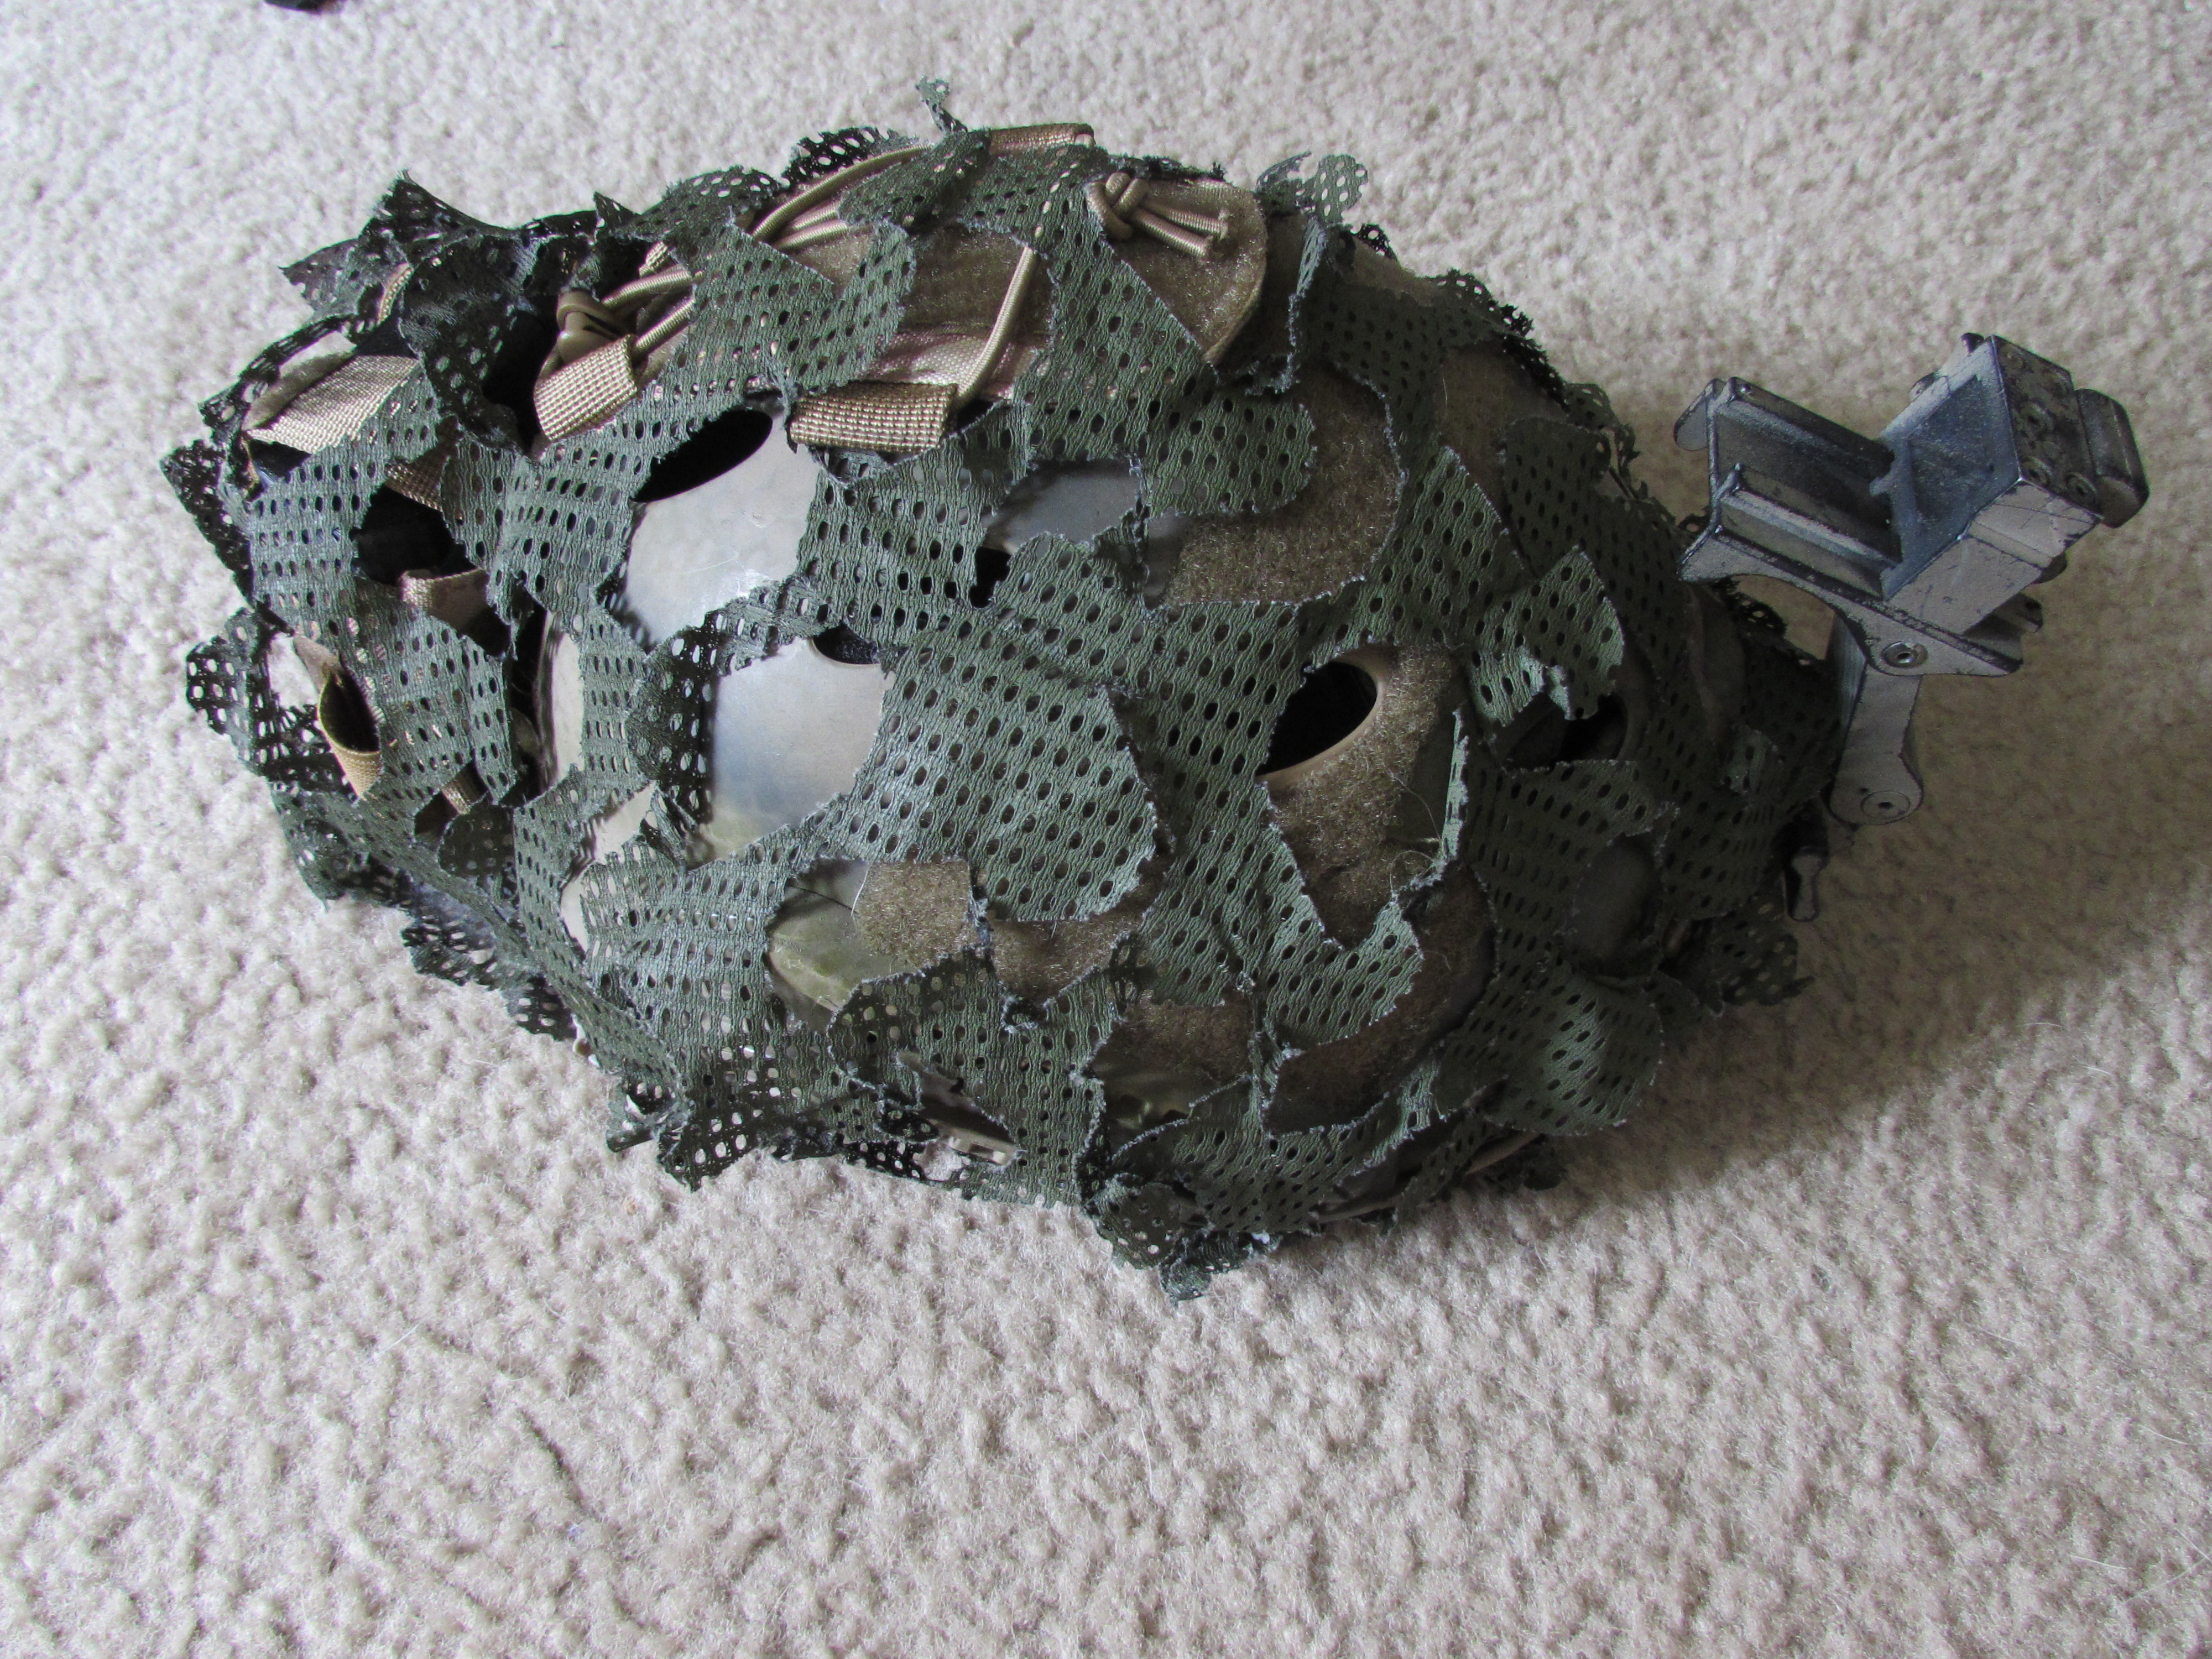
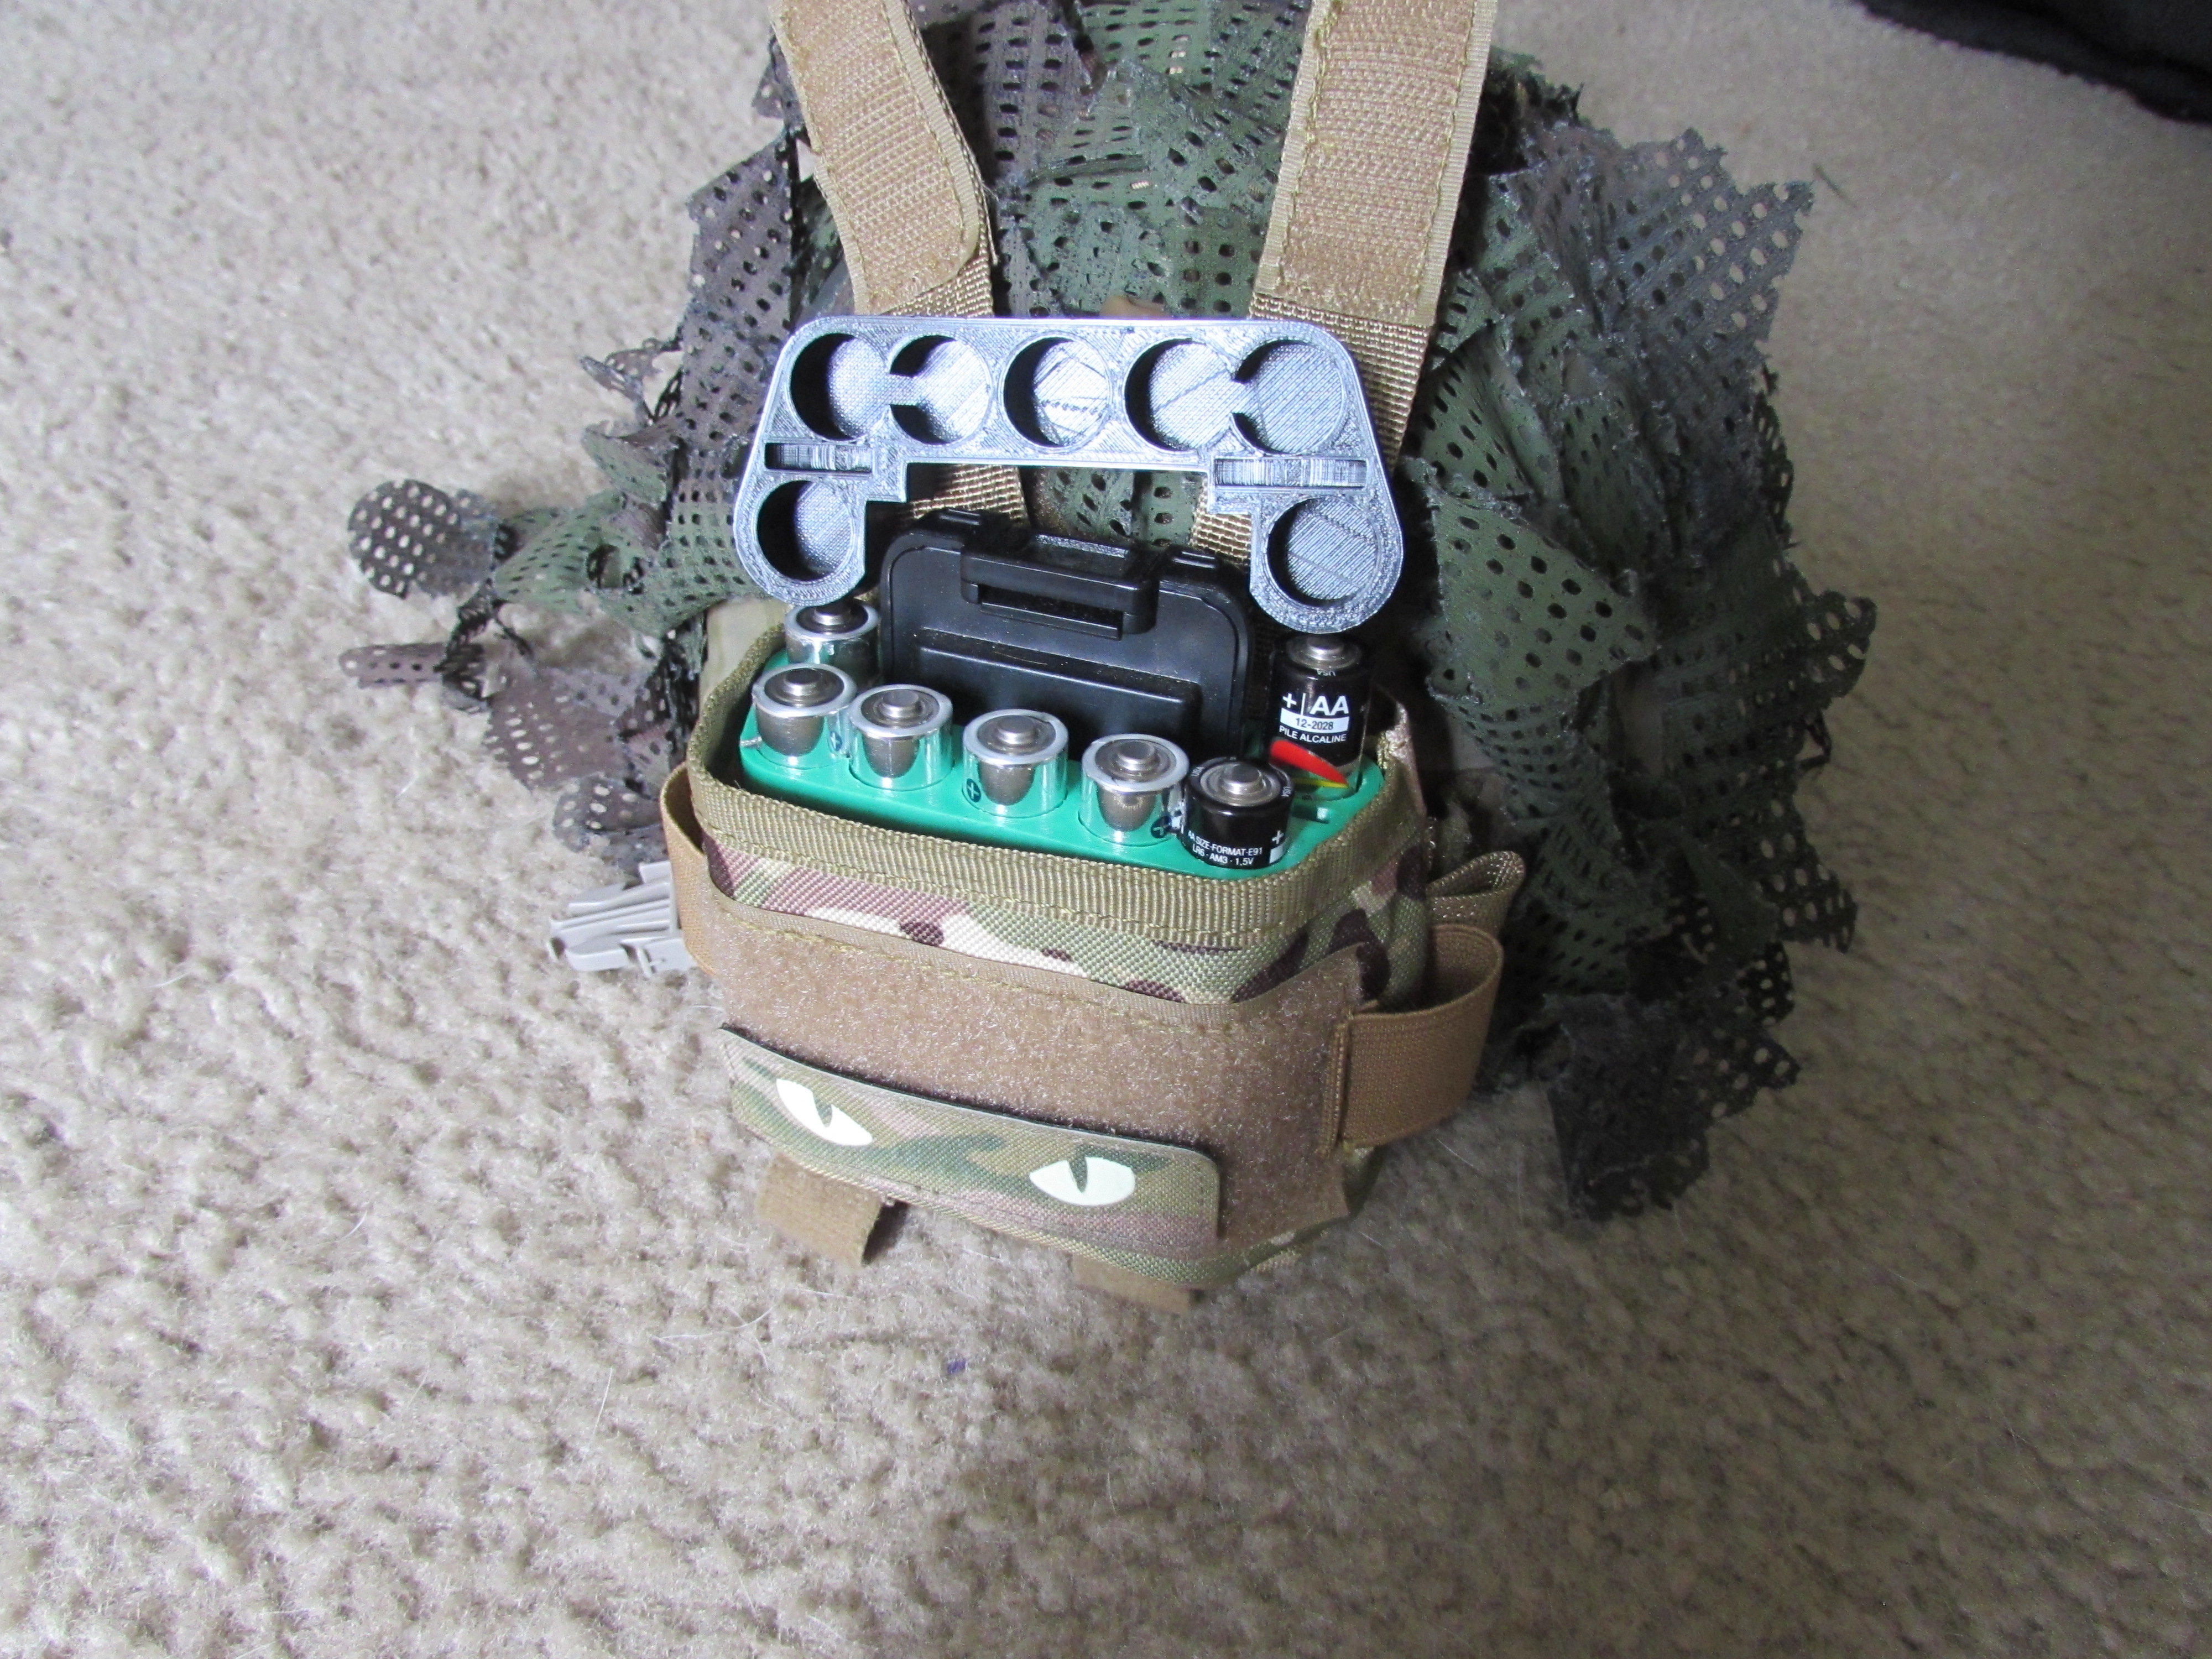
Helmet
One last thing I want to mention is my helmet. I wear a light bump helmet so that I can wear my NVG. It is painted camouflage with camouflage netting draped over it to break up the shape. On the back I have a battery holder counterweight in a PVS-31 battery pack pouch. This allows me to balance the weight of the helmet while carrying all of my spare batteries (AAs, AAAs, CR-123s, CR2030s for my scope, and a spare UV-9R or 5R radio battery).
Summary
There you have it, my combat equipment set up for light infantry operations in rural wooded areas. A good amount has changed with my kit, and will no doubt continue to change as I go forward. Despite the experience and thought that went into this setup, I am fully confident that in a few months or so I will have changed something significant about my gear. I am always learning and adapting my doctrine and my equipment.
You should be doing the same. Don’t just copy my kit, or anybody else’s. Identify your requirements for your equipment, ask yourself “What do I need this to do for me?”, and only put stuff in your pack that fills those requirements. Above all, don’t ever be satisfied with where you are, be constantly testing yourself and your equipment. It is far better to find out what doesn’t work now than when your life depends on it.
My friend Badlands Rifleman has another excellent way of setting up his equipment that you should check out. His is a different perspective than mine, and he has some insights that are quite valuable. So go check him out.
Over the last few months I’ve been reposting my old Tactical Decision Games (TDGs) from American Partisan. For those who are not familiar, a TDG is a mental wargaming exercise designed to get you practice making tactically sound decisions in a hypothetical scenario. The ability to make sound and timely decisions based off incomplete and imperfect information is a critical skill to have, especially as a team leader.
I started this series because it is a very cost-effective way to practice force-on-force decision making. Anyone can memorize a field manual’s worth of tactics, techniques, and procedures. The mark of a tactician is knowing when and how to use the tactics from those manuals (and sometimes, when NOT to). Ideally, you practice this at in-person training classes with real, live teammates and a real, live opponent. TDGs are excellent supplements to such training, even though they cannot replicate or replace the experience and value of practicing force-on-force in person.
My TDG format, particularly from season 2 when I started doing the Recap and Analysis for each scenario, was inspired by the book “Mastering Tactics” by Maj. John F. Schmitt, USMCR. I studied and played through the TDGs in that book as a young Sergeant of Marines, and they helped develop my own decision making skills. If you haven’t already found this book, here’s a link to the PDF version. The scenarios found therein are written for Marine Corps NCOs and officers, and are thus about conventional military forces and operations. Still, the fundamental principles taught in the scenarios translate universally, and I highly recommend it.
This leads me to the present. I enjoy writing these TDGs, but a few facts must be brought forward for consideration:
Each TDG takes a couple hours for me to write, edit, and make maps for. Plus a few more hours reading answers and writing the Recap and Analysis.
I am still on active duty, in addition to running VSTAC training classes and this blog. I also have a kid now. Most days I am up until 1 or 2 in the morning writing articles, class material, or TDGs.
Bottom line, I am having a hard time justifying how much time I spend writing/working instead of with my family. But I really want to continue the TDGs, as I know how valuable they are to you all as training tools.
So here is where that leaves us. I will continue writing TDGs, just not every week. I will post them in the usual format, but I will not publish the Recap and Analysis on the blog. Instead, I will be compiling the TDGs and their recaps into a book and publishing them together in a similar format to Schmitt’s “Mastering Tactics”.
My time and experience is valuable, and I can no longer afford to provide what is essentially free training without being compensated for the time spent not playing with my little boy. I am leaving the first 16 TDGs up along with their recaps, so feel free to revisit them as much as you want. Again, I recommend Schmitt’s book for 15 more TDGs, even though they are written for Marines and conventional military troops/weapons. The principles of warfare and tactics can be universally applied, and Schmitt does an excellent job of teaching them.
Originally posted on American Partisan on July 16, 2022
In “The Long Road Home,” we have another very hairy situation. Our convoy has taken several security measures and still has fallen victim to an ambush. This is an example of a situation where, despite us doing everything right, we still end up on the short end of a gunfight. Combat is like that. We can increase our odds through training, sound judgement, and good doctrine, but every time we go out we are still rolling the dice, and even a 20-sided die will sometimes roll a 1.
Unfortunately, despite our best efforts, the enemy has successfully initiated an ambush against our convoy and 1st squad is unable to move. Fortunately, we used good tactics by dispersing our vehicles such that only one of them is in the kill zone of the ambush. This grants our squad freedom of maneuver so that we can choose how best to react.
I want to use this session to talk about the concept of battlefield initiative. In any engagement, one side initiates hostilities. The side that starts shooting first normally has the upper hand because they have taken an action which forces the other side to react. This is called having the “initiative” in a fight. Once your enemy is reacting to you, you should seek to take more actions which force more (ideally predictable) reactions in rapid succession so that you dictate how the fight goes. He who keeps the initiative and directs the fight usually wins. He who is constantly reacting will eventually be backed into a corner. This rings true from the chessboard to the battlefield to political posturing.
That said, there will be times when we don’t have the initiative at the start of an engagement, either through bad tactics or bad luck. This does not mean that we have already lost, it just means that we should try to find ways to take the initiative away from our enemy. There are many ways to take the initiative on the battlefield, not all of which involve shooting. Simply maneuvering can be enough of an action to provoke a reaction from our enemy. Once we have taken an action that forces our enemy to react, we have taken back the initiative and should continue taking actions to maintain it.
Back to the tactical problem at hand. We are currently reacting to the enemy’s act of ambushing our convoy. However, because we are not in the kill zone, we are free to react in a manner of our choosing. We should seek to regain the initiative by taking an action that forces a reaction.
Wait for the QRF
Some have argued that since we have the precious cargo, we should not involve ourselves in this fight. We should provide our own security and allow the QRF to handle the situation when they arrive. However, it will take them several minutes to arrive, and a lot can happen in 5 minutes when you’re under fire. This ensures our survival, but likely at the expense of all six men in 1st squad. Further, when the QRF arrives, we will not be in a position to support them, and they could themselves be ambushed.
Dismount and flank
The majority of answers had some variation of dismounting our vehicle and maneuvering into a position to lay down fire on the ambushers. The wooded terrain to the North of the road offers the best cover and concealment, and depending on how firm the ground is on that side of the road, we may even be able to drive our vehicle off-road on the North side of the treeline a ways before we dismount. This would ensure that we get into position as quickly as possible.
We must weigh this course of action against the possibility that there may be enemies in those trees that 1st squad hasn’t seen yet, in which case taking the vehicle any closer could be hazardous. But at the same time, if we can use our vehicle to maneuver quickly without an unacceptable level of risk, we should take advantage of the speed it offers so we give 1st squad a better chance at survival.
Our sudden appearance from an unexpected angle would no doubt force a reaction from the ambushers, possibly even force them to break contact. Even if they merely shift their focus away from the van, it would be enough of a reaction to possibly enable another action on our part towards rescuing 1st Squad.
Drive up to the van to conduct a hasty rescue
This is certainly an action we could take. However, if we consider that the enemy is already oriented on the van, our action of driving into their kill zone is not going to take the initiative for us because it doesn’t force a reaction from the enemy and restricts our options for further decisions. It is also a very bad idea because we are very exposed in soft-skin vehicles, and will find ourselves in the same boat as 1st squad.
Conclusion
The ability to make sound decisions under stress is the mark of an effective combat leader. When we are under stress our mind tends to make shortcuts. If we are accustomed to playing it safe this will often result in inaction, leaving the initiative in the hands of our enemy. But if we develop a bias for action, building the habit of looking for ways to take back the initiative, we can train our minds to look for actions we can take that turn the tide of the battle in our favor.
One final point is that you cannot take a conventional military mindset into unconventional warfare. This scenario was based on a video clip of a Ukrainian vehicle convoy that was ambushed by Russian infantry. Watch the decisions that were made in the video below and observe what happens when you take habits from conventional military training designed for armored vehicles and try to use that training with thin-skinned cars.
During my time in the Marine Corps, I spent a lot of long field ops living out of my backpack. This was the case in every unit I served with, from a division COC to an infantry regiment to ANGLICO teams. As an amphibious expeditionary force, Marines never get too attached to our vehicles, and remain prepared to transition to light infantry operations at any time.
The 5-day Jäger Course is designed to teach you how to conduct light infantry operations while living out of your pack in a patrol base. It’s one thing to grab a backpack and camp out for a night; it’s an entirely different experience doing it for several days while people are hunting you. That is why this whole course is spent living outside, using just what is in your pack. Along the way, I will share the tips and tricks that I learned over the 8 years I spent doing this on field ops and deployments.
This course covers the full spectrum of individual skills required to conduct an extended patrol. By the end of Jäger, you will be able to:
engage targets out to 400m and direct other riflemen onto those targets
set up a covert, low-profile shelter
hide from thermal-equipped drones
and much, much more.
The full 5 days are treated like an extended patrol. We sleep outside under tarp shelters and resupply our water by filtering/purifying what we can collect. When our packs are not on our backs, they are camouflaged and concealed at an objective rally point or a patrol base. And no matter what we are doing, every man has their rifle either slung or within arm’s reach, fostering a mindset of constant vigilance. The vigilance is warranted, because the OPFOR will hunt for our patrol base, and we are not safe even when asleep.
On day 1, you are assigned to a fire team and squad. Everything you do, you do with your fire team. You plan your missions together, take turns standing guard while the others eat, and fight side-by-side. You will spend so much time working together that you will quickly mesh into a smoothly operating machine. And on top of that, you will develop a bond with your fellow Jägers that will last even beyond the course.
We will practice both using and evading drones. Drones are to the 21st century what machine guns were to the 20th; they’re revolutionizing how we wage war and we must adapt to this reality if we are to survive. A half day of this class is dedicated to using commercially available drones for reconnaissance, maneuver support, and psychological effects. In the process, you will also learn how to mitigate the effect that hostile drones have on your patrol.
Finally, the Jäger Course teaches you how to locate and hunt down an enemy force while remaining undetected yourself. Over the course of the week you will hunt down the enemy, observe their patterns of life, harass them with sniper fire and ambushes, and then raid their camp. The tactics taught in this course include:
Team-level fire and movement
Squad-level fire and maneuver
Immediate action drills
Ambushes
Observation post selection and occupation
Tactical employment of technology (drones, electronic warfare, and radios)
Patrol planning
Raids
I want you to see this course as a challenge. I am challenging you to grab that backpack you have in the corner and test whether you are ready to trust your life to its contents. If you accept this challenge, we will go to the field together and we will find the kinks in your setup. Then we will fix them, and you will make it the full 5 days. On Saturday, you will leave with a thorough knowledge of your equipment, confidence in your skills, and the Jäger tab on your sleeve.
Originally posted on American Partisan on July 12, 2022
A TDG is a Tactical Decision Game, a mental wargaming exercise designed to get you practice making tactically sound decisions in a hypothetical scenario. The ability to make sound and timely decisions based off incomplete and imperfect information is a critical skill to have, especially as a team leader.
You will be given a scenario, confronted with a tactical problem, and given a time limit to think about and write out your answer. The time limit is to simulate the pressure of a real-world tactical decision, where you must quickly assess the information you are given and come up with the best answer you can. Then comment below with your answer so you can discuss each others’ solutions.
TDG 16: The Long Road Home
2 months into WROL. State and federal authorities are still struggling to regain control of the nation. County officials, small towns, and individual communities have been forced to take charge of their own well-being and work with each other to the point where you have somewhat re-established order. Your small town is one of these, and has stood up an impromptu militia force to keep the wandering bands of thugs at bay.
Your town has trade agreements with the neighboring communities and towns to get whatever items you need. These trade agreements are done through vehicle convoys between towns, which must be executed very carefully. Anything on the roads at this point draws a lot of attention, so the militia is tasked with protecting the convoys.
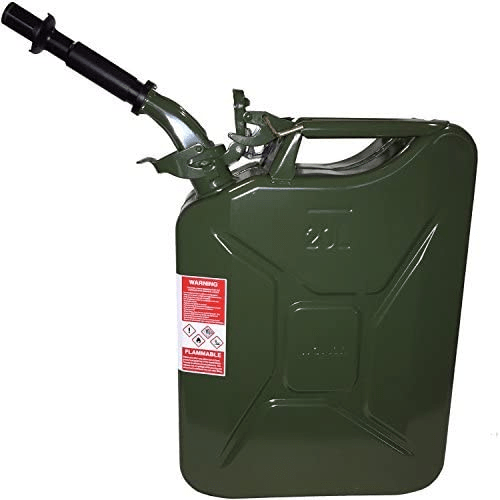
NATO metal jerry cans are excellent for storing and transporting extra fuel. Affiliate link: https://amzn.to/3m6oAmY
YOU are the second squad leader in the latest convoy to the town of Fairfield, about 20 miles East of your home town. Prior to departure, the convoy commander tells everyone the plan.
“The town is low on gasoline, so to save fuel we are only taking two vehicles this time instead of our usual three. We are going to use primarily gravel country roads to avoid the highways, which is where bandits like to set ambushes. 1st squad will take point in Josh’s van, because it has better observation from the higher windows. 2d squad, you guys will follow with the cargo in Jose’s station wagon, about 1km back. You can get closer if you need to, just stay within line of sight. 3d Squad will be on standby here as QRF in the third vehicle in case something happens. I will be with 1st squad.”
Each of your 6-man squads is equipped with the following:
5x AR-15s
1x .308 DMR (FAL, PTR, or AR-10)
2x CB radios (1x mounted in the vehicle, 1x handheld for dismounts)
The trip to Fairfield is uneventful, and you make the transaction successfully. As planned, the precious cargo of medicines, bleach, and electrical components is loaded into the back of your vehicle and you begin the trip home.
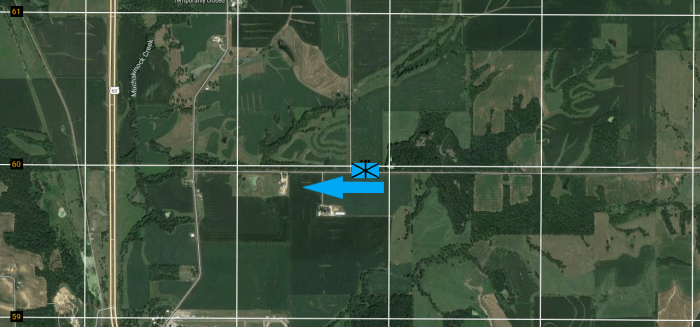
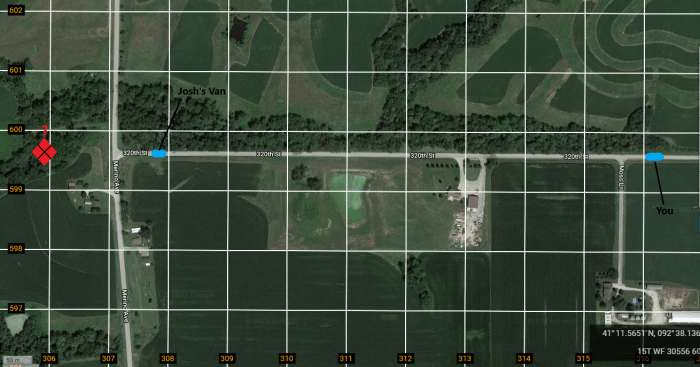
On the way home you are heading West along 320th St approaching a planned right turn onto Merino Ave. Suddenly you hear a crackle of gunfire ahead, and you see Josh’s van come to a halt about 75m short of the intersection. You tell your driver to halt the vehicle, and order the rest of your squad to dismount and set security. You hear the occasional snap and whine of ricochets whistling past you from very far ahead.
As you are pondering what to do, the CB radio comes to life. “It’s an ambush! They’re in the treeline to our front! My driver is dead and I’m hit! You’ve got to help us! They’re chewing us up!”
CB radios are an excellent license-free option for inter-vehicle communications. Affiliate link: https://amzn.to/40TVzcM
You consider your options. Your home is 5 miles NW from you, where 3d squad is standing by as QRF. You call them, but it will take them a while to get here on the back roads, you estimate they’re probably 10 minutes out.
In a time limit of 5 minutes, draft the frag order that you would issue to your squad. Write down any special instructions you would give to the QRF and provide a brief rationale for your actions.