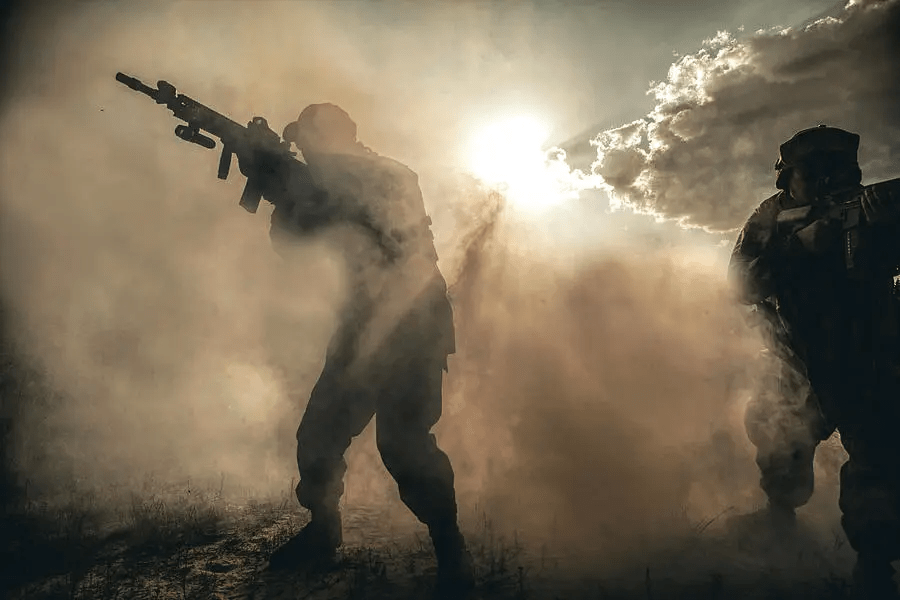
Tactically Communicating

Yesterday I went to a local airsoft field with a buddy of mine.  We train regularly together on a lot of things such as fieldcraft, marksmanship, radio testing, etc.  We also occasionally go to airsoft matches as a force-on-force supplement to our normal training.  Sure, it’s not the most realistic type of training, but there are some very good benefits that you can get from airsoft events.  The most important one is the practice we get communicating with each other.

I cannot over-emphasize how important it is to practice communicating with your team of shooters.  A team that communicates and coordinates their actions to fight as a single entity will always have an edge over a group that fights together but doesn’t coordinate their actions.  The Romans realized this, and this is how they were so effective with their tightly controlled formations.

Yesterday I had a prime example of this in action.  The match we attended was open to the public, with players split into two teams as they arrived.  In one of the rounds, my team was defending an objective against the attackers who had unlimited respawns.  My buddy and I headed to one side of the map and decided to hold down our right flank together.  We got into position, with myself inside a building watching through a window, and my buddy on the right side of the building on the outside wall.  We were close enough that we could talk to each other, but far enough apart that we could not both be engaged at the same time.  Once in position, we called out different landmarks in our fields of fire so we could use them as target reference points (TRPs), and how far to the left or right each of us could shoot.

Once the round started, we called out to each other every time we saw movement.  If an enemy was moving into my buddy’s field of fire, I would let him know so he could engage.  He did the same for me, and the effect was brutally effective.  We were positioned such that an enemy covered from one of us would be exposed to the other one, and we were not easy to see from as far back as we were.  Inevitably, one of us would start taking heavy fire and had to pull back behind our cover.  Whoever was getting suppressed would call out the enemy, and the other one of us would shift into a position to take out the enemy shooter.  The two of us held down the right flank pretty much alone for the entire game.

The enemy eventually decided that our right flank wasn’t worth attacking, and focused their attention elsewhere.  We lost that round, but only after the rest of our team on the left side got overwhelmed.  It’s interesting to see how two guys coordinating their efforts did what ten uncoordinated players couldn’t.  A testament to just how important it is to practice communicating with your team.

If you want to learn how to organize, train, and lead a team of shooters, come to a Team Leader Class sometime.  I don’t have many more classes on my training schedule at the moment, but I’ll be adding more in the coming months after my son is born.  In any case, get out there with your guys and train together.  You cannot get better at communicating by yourself.

Tactical Employment of Smoke Grenades

Smoke grenades are a valuable tool that I teach every Team Leader Class how to use.  Come to a class to learn more.

Smoke grenades are versatile tactical tools that are not commonly discussed.  They’re simply not as flashy as rifles and body armor, so most people are ignorant of how useful they are.  For millennia, people have used smoke for signaling or screening movement, and we still do.  Today I will cover different uses for smoke grenades, considerations for their use, and what options we have available to us as civilians.

Tactical applications of smoke

Screening movement

This is the most obvious use of smoke grenades that everyone immediately thinks of.  If you’re taking fire and you need to break contact, you can pop smoke between you and the enemy to make you harder to engage as you bound or peel towards safety.  It is important to note that blocking line of sight works both ways, and that smoke between you and an enemy will make it as hard for you to see your targets as it does for the enemy.  For this reason, if you have multiple teams in contact with the enemy, only one element should pop smoke and move at a time so you can still maintain some pressure on the enemy as you move.

You can also use smoke to screen movement across a danger area if you can’t suppress the enemy watching it.  This is not the only way to solve such a tactical problem, but it is one option.

Deception

As I stated above, most people only think of smoke grenades in the context of a break contact drill.  You can exploit this mental shortcut to trick an opponent into believing you are doing something that you are not.  There are infinite possibilities here, but I will provide a few examples.

  • Use smoke to draw enemy fire.  Upon seeing smoke, most opponents will assume that you are moving behind it, and spray into the cloud.  You can exploit this by throwing smoke somewhere you do not plan to move, and then scoot the other way when the enemy gets tunnel vision on your smoke.  This is especially effective in urban environments.
  • Use smoke to convince the enemy you are breaking contact.  By having one element pop smoke and cease firing, followed by the other element ceasing to fire, you may convince the enemy that you have left.  This can enable you to either slip away after the enemy moves on, or to ambush them when they expose themselves to “pursue” you.
  • Use black smoke next to a vehicle to convince the enemy that the vehicle is disabled.  There are a number of reasons why you would do this, but the first one that comes to mind is to ambush an overconfident enemy that believes they are winning.  It could also deter them from further firing at said vehicle.

As I said, there are infinite possibilities when creating a deception plan.  All deception plans, however, are highly subject to your estimation of the enemy’s mindset and your knowledge of their SOPs and doctrine.  A deception that works on one enemy may not work on another.  And a deception, once used, will not be as effective a second time, and will get you killed the third time.  Don’t establish patterns.

Marking Targets

Smoke can be used to mark targets for a support-by-fire element (or air support, if you have it).  Smoke launched from a grenade launcher or 37mm flare launcher is preferred for this, so you don’t need to get within throwing distance of an enemy position to mark it.

You do not need to get smoke directly on an enemy position to mark it, you can pop it into the middle of a field of fire to use as a hasty target reference point (TRP).  For example, “THEY’RE MANEUVERING TO THE LEFT OF THE GREEN SMOKE!”

Marking Friendly Positions

When coordinating multiple teams, you may find yourself in a situation where you need to mark your position to a support-by-fire element, a QRF, or aircraft/UAS to avoid being shot at by your own guys.  Smoke is an effective means of doing this during the day.  It greatly helps if you have established this as an SOP ahead of time.  If you have not, you will need to inform the friendlies over a radio that you are marking your position with smoke.

Clearing a room/vehicle

This is rather unconventional, but can be effective nonetheless.  As civilians, we really shouldn’t be kicking in doors and clearing rooms if we can at all avoid it (you die in CQB).  If you have an enemy holed up in a room and you want him to come out, you may be able to coax him out by popping a smoke grenade or two into the room with him.  He can then either suffocate or exit the room.  Do it in such a manner that he cannot throw the smoke grenade back out.

Considerations for Employment

Now that you know when you might want to employ smoke, here are some things to consider:

  • Smoke dissipates faster in open terrain than in close terrain.  This means that smoke will linger for longer and remain in a thicker cloud in dense forests or urban environments than in open fields.
  • When using smoke to screen movement, one is never enough.  Always pop at least two smoke grenades when you are planning to maneuver behind it.  If you’re in an open environment or there is wind, more is better.
  • Wind can either help you or hurt you.  If the wind is blowing left/right, you can move with it for a short ways so that it screens you longer.  If it is blowing towards the enemy, it will block your opponent’s line of sight for slightly longer.  Regardless of direction, however, if the wind is blowing hard enough your smoke can be simply rendered ineffective.
  • I strongly recommend that you sit down with your group and come up with an SOP for how to use smoke grenades.  This should be included in your SOI/CEOI along with your communications plan.  Have different colors selected for different uses (i.e. white for screening movement, red for marking targets, purple for marking friendly positions).
  • As a COMSEC measure, never say the color smoke you are using to mark friendly/hostile positions over the radio.  An enemy listening to you can exploit this in a number of nasty ways.  Instead, say “position marked by smoke” and when they see the smoke, they tell you on the radio what color they see.  If it’s your color, tell them so.  It helps to have some unusual colors of smoke available (like purple or green).  Even better, if you have an SOP in place, you don’t need to mention the color over the radio at all.

Tactical Smoke Options 

There are a number of different options for handheld smoke grenades, but my recommendation is Enola Gaye EG-18X smoke bombs.  They are about the size of a coke can, have a wire-pull ignition system, and put out a comparable smoke cloud to military smoke grenades (in my experience, they do it faster).  At $19 each, they’re affordable to just about anybody.  They also fit in standard sized military smoke grenade or flashbang pouches.

The only downside I have noted is that the outside of the grenades feel like they’re made of waxed cardboard, which might stand up to a paintball match but probably won’t last long in soggy field conditions.  I remedy this by coating the outside of the grenades in dark green duct tape.

Note how I didn’t cover the hole in the top where the smoke comes out

This does two things for me.  First, it makes the grenades more water-resistant and durable.  Second, it neutralizes the color so that the bright colored wrapper doesn’t make my pack more visible.  As a final step, since my crew utilizes multiple colors of smoke for different purposes, I mark the grenade with colored electrical tape so I know what color it is.

One last option I would like to mention is 37mm flare launchers.  There are commercially available smoke rounds for these launchers, which can launch a smoke grenade up to 140m.  This could be very useful if you want to use smoke to mark something from a distance.  I have never used one of these personally, so I cannot attest to their effectiveness.  It is, however, an option to consider.

Summary

Smoke grenades are valuable tactical tools with a variety of uses.  From screening to communicating to deception, tactical employment of smoke is something that you should train to utilize.  If you buy smoke grenades, buy plenty of them so you can train to use them and get an understanding for how they really work.

If you would like to experiment with smoke grenades, I will have some available for use during the Force-on-Force Lab on March 26-27.  There is no better way to figure out what works and what doesn’t than to pit yourself against a breathing, thinking opponent, so don’t miss this opportunity.

VonSteuben Training Sends: Mike’s Jäger Kit Part 3: Pack

“Pack up your troubles in your old kit bag and smile, smile, smile!”
WWI British song

This is the final article in my 3-piece series about my kit.  First I showed you my current belt setup, with all the barebones rifleman essentials necessary to get me into the fight.  Second, I covered my chest rig, with extra ammunition and tactical tools to get me through the fight.  Today, we take a look at my pack, which contains everything necessary to sustain me in the field for up to a week or more.

You may already be speculating on what kind of large rucksack I’ve selected for this purpose.  Is it a USMC surplus FILBE main pack?  The classic ALICE?  A large internal frame pack?  Or some other fancy new ruck?  My answer will probably surprise you; I use a USMC surplus assault pack.

Left: A simple USMC assault pack.  Right: The same pack with my modifications.

I know what you’re thinking.  “How on earth can he get by for a week out of such a small pack?  Don’t you need a lot more than that?”  The answer is no, at least not for my area.  If I lived further north, I would need a larger pack to account for warming layers, a better sleeping bag, and more calories worth of food.  However, I live in North Carolina, and that means that I can get away with carrying significantly less gear.  Additionally, years of going to the field as a Marine taught me what I actually needed to get by and what was a luxury.

My requirements for my pack are that I can use it to survive in the field for at least a week in warm weather (4 days in cold weather), carry additional ammunition and tactical tools to accomplish my mission, and weigh less than 45 pounds dry (i.e. no water) when combined with the rest of my kit.  As spoiled, domesticated Americans, we are accustomed to being comfortable.  This means that most people tend to overpack when going to the field (or just camping in general).  I have discovered that you can save a lot of weight in your pack once you get comfortable being uncomfortable.  In reality, there is a very short list of things that we actually need to get by, and we can break it down into 3 categories: Water, food, and shelter.

Water is the most obvious; without it we will die in just a few days.  However, water is heavy, and it is not realistic to carry enough water to last me a week.  The balance I have found is to combine a 2-liter camelback with two USGI canteens.  This is, for me, about 2 days worth of water if I’m not hiking a lot (in which case it would be 1 day’s worth).  Fortunately for me, there are a lot of natural sources of water in my area such as streams, so I can resupply water in the field.  This is why I have a Sawyer Mini water filter in my buttpack.  It’s not the best filter out there by far, but it’s super compact and lightweight.  I am also about to buy some water purification tablets to supplement my filter, in case I need to pull water from a pond or other questionable body of water.

Food is necessary to give us the energy to accomplish daily tasks.  I use field-stripped MREs for my field rations, as they’re self-contained and have a lot of calories.  I plan to eat 2 a day when I am being very active, 1 a day when I can get away with it to make them stretch.  There are plenty of other options for field rations (freeze dried, canned soups/chilis, or even just dried rice and beans), but this is what I currently use.  Bear in mind that you don’t need your food to be hot, you just need to be able to swallow it.  I see small field stoves as luxury items.  Even if you don’t have access to MREs, you can eat canned chili cold and you’ll be fine.  Dry goods, however, may require boiling to be eaten regularly.

You need some shelter, but this is where people tend to over-pack.  You need shelter to protect you from 4 things: heat, cold, wind, and precipitation.  Do you really need a fully enclosed tent to accomplish these things?  No, a tarp or USGI poncho will do all of this just fine, and it takes up significantly less space and weight.  In my area, there are so many trees around that I can get away without even carrying poles or stakes.

All right, now that we’ve covered what we actually need to survive, let’s look at what’s in my pack.

Let’s break it down into sections.

First, the main pouch of the pack.  On the left side is my field rations (field stripped MREs)  I keep five in there normally, but I have space to add more if the mission requires.  Underneath the MREs is some mesh camouflage netting that I can use to camouflage my pack, or drape over myself when I’m in a firing position.

On the right side, from top to bottom, are my sleeping bag (Snugpak Jungle Bag), warming layers, and one skivvy roll (t-shirt, underwear, and socks).  You’ll notice that I use a couple of small waterproofing sacks for my gear, rather than one large waterproof sack.  This keeps my pack organized, and it’s easier to find what I need in the dark without a light.

Next, we have the front pouch of the pack.  I keep items in here that are either too small for the main pouch or are used too frequently.  From left to right: Duct tape, 100% deet bug spray, hand warmers and Bible, hygiene kit (toothbrush, toothpaste, razor, and deodorant), matches, field sewing kit, and a survival fishing kit.  On the bottom is my fix-it kit, 30 feet of paracord wrapped around a pack of zip ties.  You can fix a lot of problems in the field with these two items.  I once zip tied a Marine’s boot back on his foot after his laces broke beyond repair.  Trust me, you need zip ties.

Finally, we have gear that I keep on the outside of the pack (except for the canteens, they go in the main pouch).  From left to right: Bump helmet (for use with night vision only), chem lights (2 green, 1 red, 1 IR), USGI entrenching tool (E-tool), 2x extra smoke grenades, 2x rifle magazines, and a GI casualty blanket camouflaged with mossy oak netting.

I use the bump helmet solely for mounting my night vision.  It has a special counterweight on the back that was designed and 3D printed by a buddy of mine.  It holds 8x AAs 3x CR123s, and 1x Baofeng UV-9R battery.  Not only does this balance out the helmet, it is an excellent way of holding my extra batteries for all my gear.   The helmet is held onto the outside of the pack with a custom helmet pouch that my wife made.

My GI casualty blanket is what I use for my shelter.  Not only will it protect me from the elements, it masks my thermal signature from above if I set it up correctly.  I consider this a mandatory piece of kit for anyone who expects to be operating under hostile UAS.  I touched up mine with some cheap camo mesh and it works very well.

The right side of my pack. 2x rifle magazines and an E-tool.

You will notice that I keep consumable items like ammo and smoke grenades on the outside of my pack.  This is so that, when working in the context of a squad or a small team, we can quickly redistribute ammunition and grenades after a fight to get back up to maximum readiness faster.  You will notice that 240 rounds (8 mags total; 1 in the gun, 2 on the belt, 3 on the chest rig, and 2 on the pack) is not a lot of ammunition for over a week of operations.  Fortunately, light infantry tactics don’t rely on heavy firepower, as I discussed in my article on the history of the Jägers and light infantry units. 

I have a fair amount of extra room in the pack for additional rations, ammo, and other mission-specific equipment if I’m planning on a longer (2 week) field stay.  Any longer than that and we will have to plan to supplement our rations with what we can scrounge, gather, fish, or hunt in the field.  Alternatively, a light infantry unit may be able to coordinate a covert resupply in the field using civilian vehicles, but that’s a whole ‘nother article.  As far as batteries go, I have a compact solar-powered means of recharging radio batteries and AAs in the field.  I have it ready to throw in my pack if I’ll be out for a long time, but for short-term operations of a week or less it takes less weight to just carry enough extra batteries.

Summary

There you have it gentlemen, my current pack set up for light infantry operations.  The gear that you see here and in the previous two articles is enough to sustain me for up to a week in the field without resupply.  I must mention that this is a science, and thus by no means settled as the “one true way” to set up a pack.  Despite the experience and thought that went into this setup, I am fully confident that in another year or so, I will have changed something significant about my pack.  I am always learning and adapting my doctrine and my gear.

You should be doing the same.  Don’t just copy my kit, or anybody else’s.  Identify your requirements for your pack, ask yourself “What do I need this pack to do for me?”,  and only put stuff in your pack that fills those requirements.  Above all, don’t ever be satisfied with where you are, be constantly testing yourself and your equipment.  It is far better to find out what doesn’t work now than when your life depends on it.

That’s all I have for you gentlemen.  Let me know if anything here piqued your interest and you’d like me to write more about it.  If you’d like an opportunity to test yourself and your gear, I still have plenty of space in the Force-on-Force class on March 26-27.    I look forward to training with you!

VonSteuben Training Sends: Mike’s Jäger Kit Part 2: Chest rig

Gear does nothing for you if you don’t have training to know how to use it.  Check out the training schedule for new course offerings over the next few months.

Yesterday, I discussed my belt setup.  Whereas my belt rig contains all of my “rifleman’s essentials,” my chest rig is set up to further augment my skills in a fight with additional tools of the trade.  I mentioned yesterday that I have multiple chest rigs for my different rifles, and a plate carrier for when I want to wear armor.  All of these chest rigs and my plate carrier are set up essentially the same way, with the same tools in the same places.  This way I keep a fair amount of adaptability in my kit while maintaining enough consistency to always know where something is when I need it.

From Left to Right: CAT tourniquet, EG-18X smoke grenade, 3x rifle magazines, Baofeng UV-9R, and lensatic compass

This chest rig is a Chicom type 56.  It is slightly different from the classic type 81 in that it has only 3 magazine pouches but 4 grenade pouches (compared to 4 mags and 2 grenades on the type 81).  Those of you who were with me at the last scout course may remember that it was still the original solid dark green at that time.  It stuck out so much that I stopped wearing it, and painted it camouflage almost immediately after getting home.

The smoke grenade is an EG-18X made by Enola Gaye.  Later, I’ll make an entire article about employment of smoke grenades.  For now, know that these things put out the same amount of smoke as military smoke grenades, and if anything they do it faster.  I cover them in duct tape to neutralize the color and protect them from water.  This works as long as you don’t cover the hole on top.  Note that the pouch had to be modified to fit the smoke grenade.

On my left side (picture right), I have my Baofeng UV-9R.  I prefer this model to the UV-5R for several reasons, but mainly for the fact that is is IP67 waterproof, and thus has a much more solid PTT connector that screws into place.  My lovely wife modified the pouch so that it would fit.  The radio is also dummy corded to the strap just in case.  The headset I use is a Bowman style headset, which fits over a hat or under a helmet quite nicely.

Lastly, I have a simple lensatic compass in the fourth grenade pouch.  It is dummy corded to a strap so I don’t lose it.  I am looking into the possibility of adding a small map pouch behind the rifle magazines so I can stop putting my map and protractor in a cargo pocket.

I have the straps adjusted so that the chest rig sits high enough not to interfere with anything on my belt

Summary

The chest rig, as I use it, is a good supplement to the rifleman’s essentials that I keep on my belt.  Where the belt enables me to get into the fight, the chest rig provides me with additional tools for the battle and extra ammunition to keep me in the fight longer.  I have tested this system many times in many contexts and it works well for me.  If you would like to test your gear, come out to a class and get sweaty in it.  While you’re at it, come test yourself as well by participating in the Force-on-Force Lab next month.

I hope this was useful to someone.  Next time I will dive into my pack, and how I use it to sustain myself during extended operations.

VonSteuben Training Sends: Mike’s Jäger Kit Part 1: Belt and Uniform

I still have spots for the Force-on-Force Lab on March 26-27.  Email me to sign up!

Yesterday, I posted an article about training paradigms.  The goal of that article was to get you to think critically when considering anyone’s advice about training or gear.  I want you to keep that in mind as we go through this series on my gear.  My training paradigm is that of a light infantryman operating unsupported in guerrilla-style warfare against a large conventional force, and doing so without resupply for up to a week or two.  My kit is set up specifically to support that paradigm, so consider that before copying anything from my loadout.  Also, this is the gear I was running at the Scout Course for those of you asking.

Uniform

My base layer consists of BDU-style trousers and a camouflage smock over a light shirt.  Lets start with the trousers.

I use Flektarn because it works well in my AO

My left cargo pocket always contains a flashlight of some sort, normally a mini moonbeam with multiple lenses for signalling.  If I am operating during the cold months, I keep my beanie in there as well.  My right cargo pocket is reserved for chow.  I don’t take time to sit down and eat whole meals in the field, I spread it out during the day.  This is to ensure that, as a light infantry unit, we don’t need to interrupt our operational tempo for chow, nor do we need to lessen our security posture so that half of the unit can eat at once.

My left hip pocket contains a knife, either a multi-tool or a small folding blade.  My right hip pocket is where I keep the napkin rolls from my MREs to use as toilet paper (you gotta consider everything when it comes to field logistics).

This is a replica of a WWII German smock.  This pattern is called “Sumpfmuster 44” which means swamp camouflage (sometimes referred to as “Tan and Water”).  It’s incredibly effective here in the Carolinas.

I don’t keep anything in chest pockets because I normally wear a chest rig, and can’t access them.  I do want to note that I use a quarterback’s playbook on my left arm for radio smartpacks.  I started doing this as a field radio operator in the Marine Corps.  This is where I keep useful data such as a mini-CEOI and combat report formats.  It’s very convenient, and if I go down it is easy for my teammates to find and slide off of my arm to either use or destroy it.

Belt Rig

The equipment I carry on my belt is meant to be my “rifleman’s essentials.”  I set it up in a way that, absent the rest of my kit, I can throw on my belt and get into the fight.  The belt itself is a surplus USMC “sub belt” with three rows of MOLLE.  From left to right: Two rifle magazines, dump pouch, MOLLE buttpack, IFAK, STANO gear, tourniquet pouch.  The magazine pouches are simple Condor double AR pouches that I use as hold-anything pouches.  They can hold 4 AR mags, 2 AK mags, or 2 battle-rifle mags comfortably, so I don’t need to swap pouches out when switching weapons.

My buttpack contains my “FRAGO kit,” and contains everything I need to exist in the field for one day (I must admit, this was inspired by Badlands Rifleman’s article on the topic).  From top to bottom and left to right, the buttpack contains: Ka-Bar fighting knife, USGI poncho, Sawyer Mini Water filter, red lens headlamp, binoculars, extra batteries for all my gear, and a rifle cleaning kit.  Not pictured is the one field-stripped MRE that I always keep in there as well.

My IFAK has MOLLE webbing on the outside, which hold three red chemlights (our group SOP for marking casualties, CCPs, and CASEVAC pickups at night).  The STANO pouch is a surplus RCO pouch, which is padded and big enough to fit my PVS-14 with attached J-arm, and my FLIR Breach.  Finally, one CAT tourniquet on the far right.  The TQ pouch is inverted because I don’t want it getting hung up on body armor when I’m pulling it out.

Summary

I set up my belt the way it is to facilitate modularity in my gear.  I have a couple of different rifles that I can run depending on the mission, and each one has an accompanying chest rig or plate carrier already set up for it.  By having most of my rifleman’s essentials on the belt, I ensure that I never need to move pouches around.  I just grab it and the appropriate chest rig or plate carrier and I’m ready to go.  Part II will cover what I put in the chest rig and how I set it up.

If you have questions, ask away in the comments.  If you want to practice using your gear in the context of a squad of riflemen, come to the Force-on-Force Lab on March 26-27.  I promise you will leave with a new approach to your gear and your training.

Training Paradigms: Philosophy of Training and Acquiring Gear

I have new classes on the training calendar now.  Register now while there are still spots open

When I started training people, I resolved not to become just another guy who was obsessed with talking about my gear, because as I see it, gear is largely irrelevant. You can overcome lapses in gear with training, but you cannot overcome lapses in training with gear.

However, since the last Scout Course I’ve received a lot of requests for articles about how I set up my load-bearing kit and my pack. So, for once, I am going to break my rule and lay it out for you guys in a short 3-part series of articles. Before I do that, however, I feel it is necessary to put a few things in perspective before this turns into yet another loadout dump on the internet.

Paradigm: a philosophical or theoretical framework of any kind

In the tactical world, we all have a unique paradigm that affects how we view every form of tactical input. That paradigm is formed from a combination of many factors, but can be boiled down into what kind of tactical scenario you envision yourself partaking in. For some, this could be thwarting a mugging with a concealed handgun. Others anticipate defending a rural homestead with their family. And some are professional military members. Each one of these perspectives has a different kind of threat they are preparing for, and require different mindsets to prepare for those threats. This is what forms your “Training Paradigm.”

“Tactical Inputs” are events, experiences, or media consumed that conveys some form of tactical learning. This includes training classes, accounts of historical battles, or even a walk in the woods if you glean something tactically useful from the experience. A warrior’s mindset always searches out training value in every event. How you use that input, however, is directly influenced by your training paradigm.

It is entirely possible for two people to go experience the exact same tactical input and come away with entirely different ways to use that input. For example, a civilian and a US Marine go to a CQB class. The Marine finishes the class with a write-in-the-rain notebook full of notes to share with his squad so they can train to be better at CQB. The civilian leaves realizing that CQB is brutal and extremely risky, and goes home to convince the members of his training group that CQB should be avoided at all costs. One of these training paradigms is willing to accept a high level of risk and a certain amount of casualties, the other needs to be much more risk-averse because they cannot afford casualties.

The last thing that your training paradigm affects is your tactical outputs. “Tactical Outputs” are actions you take and decisions you make based on how you process tactical inputs. Decisions such as what classes to go to in the future, what kind of equipment you purchase, and how you set up your kit.

How to keep our training paradigm “pure”

Our training paradigms can change over time, and this isn’t necessarily bad. The problem arises when our training paradigm is too vague, and we haphazardly venture forth to become more “tactically proficient” without clearly defining what we are preparing ourselves for. When this happens, we tend to superimpose the tactical paradigm of others onto ourselves, and this does not always have the best outcome. A prime example of this is how many people seek to emulate special forces personalities on the internet, even though they will be doing nothing even remotely similar to what special forces does. This leads to harmful and sometimes useless tactical outputs.

Here are 3 steps you can take to keep yourself in check and make sure that you retain a “pure” training paradigm.

  • 1. Devote some time to thinking about what exactly your anticipated threat is. Grab a cigar and a notepad, sit on the porch, and spend some quality quiet time evaluating what exactly you are preparing to face. Write it down so you can reference it later.
  • 2. Create a Mission-Essential Task List (METL), which details exactly what kind of tactical skills you need to be victorious against the threat you detailed in step 1. Will you be patrolling? On foot or in vehicles? Will you be overt or covert? Will you need to operate at night? If you have a team dedicated to your mission, you should brainstorm this with them.
  • 3. After every form of tactical input, take a step back and re-read your anticipated threat and METL. Your AAR should point to how the training applies to your mission, and enables one or more of your mission-essential tasks.

Conclusion

Your training paradigm is important to consider when participating in training events and classes. It is also important to consider the training paradigm of the trainer when considering his opinions. If his paradigm lines up with yours, you will find value in what he has to say. If it doesn’t, you may still learn a few things, but you should make sure that what he says supports your set mission and METL.

All that said, my training paradigm is that of a light infantryman operating unsupported in guerrilla-style warfare against a large conventional force, and doing so without resupply for up to a week or two. My kit is set up to support that paradigm, so you should bear that in mind when reading my articles about gear. Don’t just copy what I do, analyze it to see if it makes sense for your mission first.

No matter what your training paradigm is, however, it will always include facing off with another living, thinking human.  The only way to get good at that is to practice it, which is why you should come to training events like my Team Leader II and Jäger Course.  Email me at vonsteubentraining@protonmail.com to register.

VonSteuben Training: Introducing the Support Weapons Class in September!

I’ve officially added the first Support Weapons Class to the training schedule for September 10-11 in North Carolina.  I’ve been looking forward to offering this class for a while, I believe it fills a gap that exists in the training community.

This 2-day class covers the use of support weapons commonly available to the American Patriot such as Anti-Materiel Rifles (AMRs) and semi-automatic rifles functioning as “automatic rifles.” Going beyond simple operation and firing techniques, this class covers the full tactical context of when and how to incorporate these weapons into a team of shooters, both defensively and offensively. Students do NOT need to bring their own support weapons to attend this class.

I have previously written several articles on this topic.  Check them out below.

The Anti-Materiel Rifle (AMR): Part I

The Anti-Materiel Rifle (AMR) Part II: Employment and Tactics

The Automatic Rifle

Ambush and Counter-Ambush: A Tale from the Scout Course

Over this past weekend I had the pleasure of assisting as an “OPFOR” during the latest Scout Course.  When I wasn’t getting shot by students, I was observing the students as they practiced camouflaging, stalking, and ambushing each other.  One force-on-force exercise was especially noteworthy, and I would like to share my observations with you all.

This took place during the ambush and counter-ambush portion of the class.  One squad of students (henceforth referred to as 1st Squad) was tasked with ambushing another (2nd Squad), and set off to prepare their positions.  After several minutes had passed, 2nd Squad crossed the line of departure, and cautiously proceeded forward.

1st Squad’s perspective

The Squad leader assessed the terrain, and determined that conditions were favorable to a V-shaped ambush.  They had good intel on where 2nd Squad would come from and it followed a natural line of drift, which would funnel them right into a gap between a ridge and a small rise in the ground.    The squad leader then emplaced his fire teams as shown below (maps not to scale).

The squad leader told his team leaders to look over at him periodically for hand/arm signals.  The word was passed not to engage until 2nd Squad was almost through the kill zone.

A few minutes later, the point element of 2nd Squad came into view as they rounded a curve into the kill zone.  The point, two riflemen walking abreast, suddenly stopped and crouched down.  An instant later, another man came into view behind them holding a giant pair of binoculars.  After a few hushed words with the point, he peered through his binoculars intently towards their immediate front, and then he and one of the riflemen pulled back around the bend and out of sight.  A minute later, the last man from the point element followed suit and vanished.

At this point, 1st Squad Leader knew that the ambush had been compromised.  Judging from the terrain, he guessed that 2nd Squad would climb the hill on his left and attempt to flank the ambush.  He tried to wave to Alpha Team Leader, but he was staring intently forward.  Alpha Team on the left hadn’t seen the hostile point element, but they had heard them moving and expected the enemy to appear any moment.  It was unclear why First Squad Leader chose to remain in place, but it was likely that he didn’t want to make noise by moving or talking to get Alpha Team’s attention.

A few minutes later, shots rang out on the left side of Alpha Team.  At this point 1st Squad Leader broke his silence and yelled “They’re coming behind us!”  However, Alpha Team Leader already realized what had happened and had hastily re-oriented his team to face the new threat.  Simultaneously, multiple riflemen burst forth into the ambush’s kill zone, bounding from tree to tree and firing at Bravo Team.  This triggered Bravo and Charlie to both open fire on the four shooters now in plain view in front of them.

It was over in a minute 2d Squad was congratulated on thwarting the ambush and not getting eliminated.

2d Squad’s perspective

When 2nd Squad’s point element discovered the ambush, they had only seen 1st Squad’s Bravo team, which was insufficiently camouflaged.  When the point element pulled back, the entire squad huddled together to discuss what this meant for them.  Given the terrain, they assumed that the ambushers were in an L-shaped ambush on the left hand side of the map.

2nd Squad Leader asked for suggestions, and a lot of ideas were thrown around.  In the end, the squad leader decided that their Bravo and Charlie teams would climb the hill and get behind the suspected enemy positions.  Alpha team would wait until they heard gunfire, and then fire and move into the kill zone towards what they believed was the short leg of the ambush.

Bravo and Charlie Teams crept forward, and to their surprise did not find enemy where they expected them.  Nevertheless, they kept pushing forwards until they saw a few of the enemy ambushers further down the draw.  Fortunately, the ambushers were facing away from the flanking force, which then opened fire.

This triggered Alpha Team to spring into action, bounding between trees and shooting towards the enemy they had spotted earlier.  What they didn’t expect was the ambushers on the ridge, whom they had completely missed during their reconnaissance.  Even while the ridge was firing at them, Alpha Team didn’t notice 1st Squad’s Charlie Team for a good 40 seconds.

Lessons Learned

-1st Squad was detected because some rifles weren’t painted and their positions weren’t effectively camouflaged.  Fieldcraft is more important than you think, it can literally save your life.

-2nd Squad’s use of a 2-man point element made them twice as likely to detect the ambush, which they did.

-Once the ambush was compromised, 1st Squad Leader should have repositioned his men.  The time for stealth was over, the enemy already knew he was there.  While 2nd Squad deliberated over what to do, he could have easily moved both Alpha and Bravo teams to a better position to ambush the enemy flanking team, since he knew it was coming.  Instead, he chose to remain quiet and thus handed the initiative to the enemy.

-2nd Squad made an interesting choice in sending Alpha team into a known kill zone as a “distraction.”  Even with the ambushers suddenly distracted by the flanking maneuver, they maintained the advantage of prepared positions.  Combined with the fact that they missed the fire team on the ridge, this course of action would have seen Alpha Team wiped out.

-2nd Squad Leader made good use of his peoples’ input when making his decision.  He allowed his subordinates to make suggestions, but he ultimately made the decision.  This leadership style, called participating, was appropriately and effectively used here.  I teach more about this in the Team Leader Class.

-2nd Squad’s Alpha Team Leader made it obvious that he was the team leader.  He walked back and forth behind his point element with his weapon slung, constantly scanning with his binoculars.  This clearly identified him as an important target to the ambushers.

-1st Squad’s ambush, despite the fact that it was discovered, was properly set up as a V-shaped ambush.  The legs of the ambush were given limits on their aiming so as to avoid fratricide.  Considering that this was a group that had just met each other the day prior, it was impressive to see them coordinate a complex ambush like this.

These are just a few of the take-aways from this exercise.  This shows just how potent force-on-force training is, and how even just one exercise like this can generate a lot of learning.  This is why I am running the Force-on-Force Lab on March 26-27, a 2-day class which is completely devoted to force-on-force learning.  If you learned something from this story, imagine how much you could learn in two days of these exercises!

My email is vonsteubentraining@protonmail.com.  Get out here and train!

A brief History of Jägers and Light Infantry

As some of you may already know, I am planning to offer the 5-day Jäger Course in the coming years. The Jäger Course will be an immersive light infantry training experience, in which students will learn to work as small squad-sized elements, living for a week out of just what they carry in their packs. As an introduction to this concept, I am going to write a series of articles detailing what light infantry is, how they operate, and why light infantry tactics are critical to the modern American Partisan.

What is Light Infantry?

Light infantry is commonly defined as foot soldiers who operate ahead of a main body of infantry to harass the enemy through scouting, raiding, and skirmishing, often behind enemy lines. The concept of light, mobile troops for skirmishing has been around since ancient times with the Greek Hoplites. However, light infantry only became truly predominant in the late 18th Century into the Napoleonic era, which saw entire regiments of such troops fielded by every major European power. Light infantry tactics since then never really went away, and to this day almost every modern military fields some type of light, semi-irregular unit dedicated to harassment missions in advance of the main forces.

What is unique about light infantry?

English Light Infantry of the Napoleonic Wars.  Known by the French as “Green Englishmen” for their uniforms, in stark contrast to the red uniforms of English line infantry.

In the Napoleonic era, it was quickly determined that unique tactics and equipment needed to be adopted for these new formations of troops. While light infantry had been in use for about a century previously, it was here that many fundamental principles were established for light infantry that remain mostly unchanged to this day.

First and foremost, light infantry rely on high mobility to infiltrate through enemy rear areas and achieve surprise. For this reason, light infantry must be exactly that; light. The maximum load that a soldier can carry indefinitely while remaining combat effective is roughly 45 pounds total. A light infantryman can conduct a several mile patrol to his objective, conduct a raid or ambush, and then hike several more miles away to establish a patrol base where he reorganizes for his next action. He simply cannot do this for days on end while carrying half his body weight’s worth of gear on his back.

Second, light infantry tactics do not rely on massive firepower. I’ll say it again, light infantrymen do not rely on massive firepower to accomplish their mission. Firepower is heavy, and so is the ammo required to sustain it. Thus, light infantry rely more on accuracy at stand-off ranges, making the most out of the ammunition that they can carry with them. In the 18th and 19th centuries, light infantry were normally equipped with rifles while their counterparts in the line and heavy infantry carried muskets. Rifles took longer to load, but were far more accurate than the (relatively) rapid-firing muskets. This necessitated an added emphasis on marksmanship skills for light infantrymen.

Finally, light infantry rely on stealth and surprise. The biggest strength of a light, mobile force is the ability to strike where the enemy is least prepared for them. Conversely, the biggest weakness of light infantry is their lack of heavy firepower, and their inability to win when decisively engaged by a large enemy force. Thus, it is important for light infantry to conceal their movement and presence, to be able to strike and disappear into the terrain. Early light infantry formations, including the Prussian Jägers, recognized this truth and were often issued green uniforms as opposed to the bright red, blue, and gold uniforms of regular troops in their day. For the light infantryman, being detected prematurely is normally fatal.

In summary, the light infantryman has always had an unconventional approach to the battlefield. He carries less equipment in order to remain mobile and achieve surprise. He places a high priority on marksmanship skill to make the most of his ammo, for he only has what he can carry. Finally, he must rely on stealth and surprise to stay alive. Considering all of this, it is not difficult to see how the mission and skills of the light infantryman are more similar to those of a resistance fighter than those of regular troops.

Jägers

Finnish Jägers on skis during the Winter War

Jägers are the German form of light infantry, one of the oldest in existence with a history dating back to the 1630s. The word “Jäger” (pronounced YAY-grr) in German means “hunter,” which fits the nature of light infantry quite well. Jägers were normally units comprised of gamekeepers, huntsmen, and foresters whose civilian careers made them ideal recruits for the specialized units of skirmishers, riflemen, and scouts.

One of the first major uses of Germanic Jägers was during the American Revolutionary War, when some Jäger units were sent over to fight alongside the British. These Jägers were also the first units to be issued rifles instead of muskets, which isn’t surprising considering that rifles were a German invention.

In the Napoleonic era, Prussian Jägers often worked in 2-man teams to protect each other while reloading, one of the earliest versions of a “buddy pair.” They were allowed significant freedom of maneuver on the battlefield in order to cause as much havoc as possible in the enemy lines. In some cases, Jägers were common citizens who supplied their own rifles and kit, and formed units out of necessity to protect their homes from Napoleon’s invading troops.

In WWI, Germany continued to field specialized Jäger regiments with incredible success in Rumania and northern Italy. It was not uncommon for Jägers to penetrate so deep into enemy territory that the enemy would be too shocked at their appearance to put up meaningful resistance. A young lieutenant named Erwin Rommel routinely convinced large numbers of enemy troops to surrender to his small detachment by casually walking up to them and stating that they were behind German lines, and needed to surrender.

In the inter-war period, Germany was forced to disband its Jäger regiments, but they kept training light infantry tactics in secret. In fact, German Jägers had such a great reputation that Finnish soldiers would sneak out of their country to secretly train as Jägers with the German Reichswehr. They brought this training back to Finland with them and formed their own Jäger units. The skills and tactics that they learned greatly benefited the Finns when they had to fight off the Soviet invasion during the Winter War. Many of those Finnish Jäger units still exist to this day, carrying on the traditions of their predecessors.

Relevance of Light Infantry

You might be thinking that this is all a quaint history lesson, but what does this have to do with the American Partisan of today? Aren’t these techniques outdated? The answer to that is a resounding no. Light infantry is just as valid as it’s ever been, and I believe it’s an excellent model for the modern patriot to follow considering the tools at his disposal. As I said earlier, light infantry tactics do not rely on massive firepower. Most of us don’t have heavy crew-served weaponry like machine guns, nor do we have the ability to rely on armored vehicles, artillery, or air support. All these are tools that modern line infantry use, so it would be foolish to train with a line infantry mindset and light infantry tools.

It is for this reason that I have dedicated Von Steuben T&C to teaching American patriots to train and fight as light infantry. My training paradigm takes the German Jäger concept combined with elements of USMC squad doctrine to create an effective model for the modern minuteman. My Team Leader Class series is an introduction to light infantry fundamentals, and focuses on how to organize and train a team to operate independently. My Patriot Sharpshooter and Support Weapons courses teach marksmanship and weapons employment techniques. And, God willing, I will eventually have the ability to run the full 5-day Jäger Course for an immersive light infantry experience.

In the meantime, I will write a series of articles about light infantry weapons, equipment, and operational concepts. If you want to come out and get training, shoot me an email. I’ve got a Team Leader Class in NC on March 5-6 and a Force-on-Force Lab on March 26-27. I am continually adding new classes to my training schedule, so be sure to check it once in a while for new listings.  My email is vonsteubentraining@protonmail.com.

The VonSteuben T&C Logo.  The Oak Leaves are a traditional symbol for Jäger troops.

Tactical Applications of Civilian Vehicles

There’s a lot of material on the internet about “tactical bug-out vehicles.” While there are many useful accessories that you can get, some guys end up spending a lot of money tricking out their truck with a lot of do-dads that they will likely never use (that’s a nice fording kit you’ve got on that lifted truck, how many 5-foot deep rivers do you ford in a year?). In reality, there is a lot that you can do with your current vehicles with little to no modifications at all. All you need to do is take a serious look at what your METL requires of your vehicles.

Before I begin listing these uses, it is important to recognize the risks inherent in using vehicles for tactical applications. First, it is very easy to trace your vehicle back to you, even without your license plate or VIN number. This is even easier if you have identifying markings on your car such as bumper stickers, personalized license plates, or identifiable damage. If your vehicle is caught on a cell phone camera, dash cam, or simply seen by someone observant, it does not take much to narrow down the few people in your town with your specific make, model, and color vehicle. This is why the IRA always “borrowed” vehicles for their operations.

Second, civilian vehicles are very bad places to be when bullets are flying. Cars are bullet magnets, and without protective armored plating, you only have 2 real options if you find yourself in a vehicle during a gunfight. Either 1: drive away, or 2: dismount and fight on foot. Despite what Hollywood would have you believe, car doors won’t even stop pistol rounds, so trying to fight from your car is a very bad idea. Fortunately, most tactical applications of civilian vehicles don’t involve fighting from them.

No one suspects a minivan of anything, ever.  Especially if driven by a woman.

Covert Troop Transport

The biggest utility of civilian vehicles is their ability to blend in while moving things or people. Covert insertion and extraction of tactical teams sounds simple enough, but there are some simple measures you can take to even further avoid suspicion.

Ideally, the insertion/extraction would take place at a time and place that fits the patterns of life for that vehicle. For example, if “Jerry” uses his minivan to drive his kids to school along country road A every morning at 7, the neighbors are already accustomed to seeing that vehicle at that place and time, and will thus ignore it. So if you need to recover a 3-man scout team along country road A, the team would set some prearranged signal on the side of the road so Jerry knows to stop and let them hop in the back. An opposition force asking the neighbors if they saw anything suspicious wouldn’t find anything, as no new vehicles came through the area that day. And if Jerry gets stopped and questioned, he has a perfect cover story. After all, the best covers are always true.

Another way to mitigate suspicion is to get creative where you carry your personnel. For example, a small van might seat several people, but if the opposition is looking for a squad-sized element, they’re likely to notice and stop such an obvious exfil vehicle. However, you can fit 2 fire teams (8 guys) in the covered bed of a pickup truck if they’re not claustrophobic. This is but one example, there are countless ways to disguise a troop transport as something else. You could also use the passenger seats like normal, and have a bunch of extra large sweatshirts for the team being inserted/extracted to throw on over their gear. You get the idea. Hiding in plain sight is the name of the game.

Covert resupply should use covert containers.  A cooler like this won’t get a second look in the back of a truck, and can hold a couple USGI ammo cans.  Throw some ice and drinks on top of the cans for added security.

Resupply of teams in the field

The same principles apply to covert transport of “stuff” as with covert transport of personnel. Appear to be something that you are not. Blend in, use existing patterns of life. The best covers are always true.

A minivan with all but the front seats removed.  Plenty of space for two stretchers.

Ambulance/CASEVAC

Having a vehicle set aside for CASEVAC is a good thing to plan out ahead of any operation, even defensive ones. An ambulance should have enough room to accommodate a stretcher or two, with space for a medical attendant to ensure continuity of care. It should be stocked with additional medical supplies to handle trauma, such as extra wound dressings and bandages. If you have someone with the training to use them, a couple of IV bags would be a worthwhile addition.

When it comes to your ambulance, functionality takes precedence over stealth. Minivans, some pickup trucks, and even trailers can be used for this purpose. If you believe that the opposition will respect it, you may choose to mark your ambulance with a large red cross. Or you might not, situation will dictate. Hopefully you have a field hospital set up, adequately staffed and supplied. Otherwise, you may have to come to terms with your casualties getting treatment from the enemy, or no treatment at all.

Surveillance Platform

Vehicles can be used for surveillance of an area, or a specific building if done correctly. In this case, it is not always possible to use a vehicle that already has patterns of life at the target, so the best thing you can do is avoid patterns. Do not drive through the same area with the same vehicle multiple times, as that will get you noticed. Instead, use different vehicles and come from different directions at irregular time intervals. Have a different set of clothes on each time as well. It also helps if the person driving is not the one doing the surveillance, so they aren’t observed looking around and can act like another bored driver focused on the road. Meanwhile the observer is concealed in the back seat, where many SUVs have tinted windows.

If conducting recon in a static (parked) vehicle, you must give the impression that the vehicle is unoccupied. Sitting in the driver’s seat of a parked car for long periods of time is not something normal people do, so you shouldn’t let people see that. In a van or other vehicle with an extended cab, often the back windows are slightly tinted while the front row windows are not. If this is the case, move to the back row and let the world see an empty cab. I have personally used this technique successfully in the past, and my vehicle was completely ignored. Nobody looks at a vehicle without a driver and guesses that there is someone in the back, unless you give them reason to. Avoid unnecessary noise and movement while observing. This should go without saying, but you should make sure that you’re parked somewhere that one would expect to see a parked car, not just randomly on the side of the road.

Sniping from vehicles has its advantages, as long as you don’t stick around after the shot.

Covert Weapons Platform

One does not need to look very hard to find examples of guerrillas, terrorists, or special forces soldiers modifying a vehicle to use it for an improvised sniper hide. Perhaps the most recent and memorable example is the beltway snipers, who cut two small holes in the back of a car for their muzzle and optic. Not only did this conceal the muzzle flash, the vehicle acted as a baffle and suppressed the sound of the gunshot a bit. By firing from inside a vehicle, the shooter also didn’t need to worry about their brass getting found by a forensics team.

Using a thin-skinned vehicle as a covert firing platform relies on the vehicle not being discovered. Normally, this means firing one shot and leaving. If multiple shots are to be fired from the vehicle, steps should be taken to protect the shooter and driver from return fire. The IRA accomplished this with improvised steel plating concealed within cars and vans that they used as weapons platforms.

Even when unarmored, technicals pose a significant threat with mobile firepower.

Overt Weapons Platform

More commonly known as “technicals,” these have tactical applications in come scenarios when you don’t care about being covert. Any number of large weapons can and have been mounted in the back of pickup trucks, from machine guns to recoilless rifles to mortars. Use overt vehicles like this for a QRF or personnel recovery team when you need to bring some firepower and bring it quick. While your typical Somali warlord would typically mount a machine gun and leave it at that, there are some other modifications you should consider when going overt.

First and most obvious, you should try to find a way to protect the driver and gunner in the vehicle. Improvised cab and turret armor are generally the way to go here, provided you have the materials and expertise to make such a modification. It should be noted that armor adds a great deal of strain on your vehicle’s suspension, so make sure that your Marvin Heemeyer contraption can still drive with that kind of weight.

Next, your overt tactical vehicle should be given a new paint job so you can effectively camouflage it from hostile ground troops and drones. All civilian vehicles, regardless of color, have a glossy finish that is impossible to camouflage effectively because it reflects light. You will need to paint over this with flat earthy colors. Krylon works fine, if you can get enough of it. Once the paint job is done, you should get some mil-surp cammie netting and size it for your vehicle. The practice of camouflaging a tactical vehicle is such an in-depth topic it deserves its own article.

Finally, make sure that whatever weapon you’re mounting on the back of your technical is worth going overt. This typically means a light machine gun at a minimum, or something else that is too heavy or cumbersome to transport and operate on foot. Or you may not mount a weapon at all, and opt to use your truck as an overt troop transport with benches in the back. Perhaps some combination of the two, let your needs dictate your actions.

Summary

Civilian vehicles can be incredibly useful for tactical applications if you appreciate them for what they are. As long as you use proper tradecraft and don’t try to make your car into something it isn’t, you will be successful in whatever operations you conduct. Remember that “tactical” means that you are using proper tactics to approach problems, not simply throwing a bunch of expensive mods at your truck. Equipment doesn’t solve problems, people with brains do.

If you want practice solving tactical problems, I still have plenty of spots available in the Force-on-Force Lab on March 26-27. Come out and get practice working in a team of shooters facing a living, thinking enemy. I also have a Team Leader Class scheduled for March 5-6 if you want to learn how to be an effective small unit leader. Email me at vonsteubentraining@protonmail.com to register.