Two years ago I discovered hawg-ops.com. It’s a very potent open-source map tool and I wrote an introductory article on it back in August 2022. Since then I’ve been fiddling around with it and have discovered a few more features that I will share with you today.
Adding Unit Icons
The site has the ability for you to add unit markers for friendly, neutral, and hostile forces to the map using standard NATO map symbols. For those unfamiliar with this symbology, detailed description of these symbols can be found at this link.
https://vs-training.com/tag/tactical-decision-game/
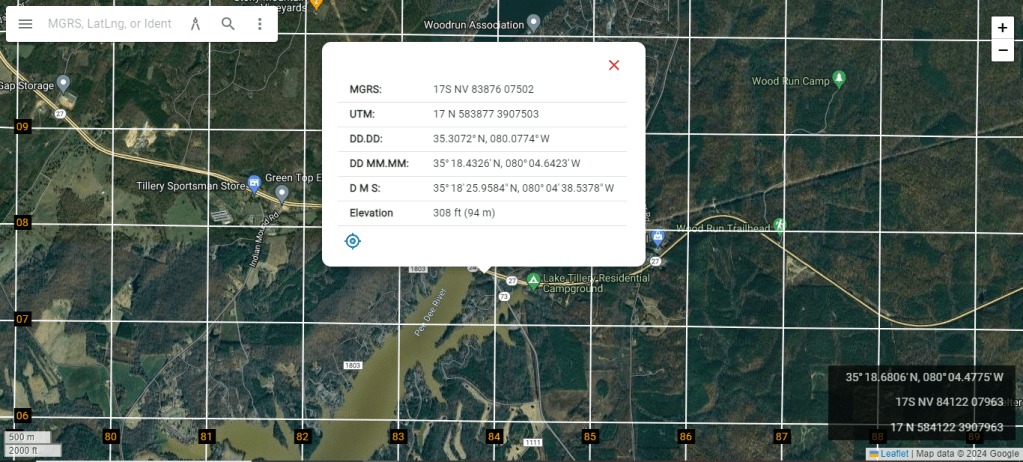
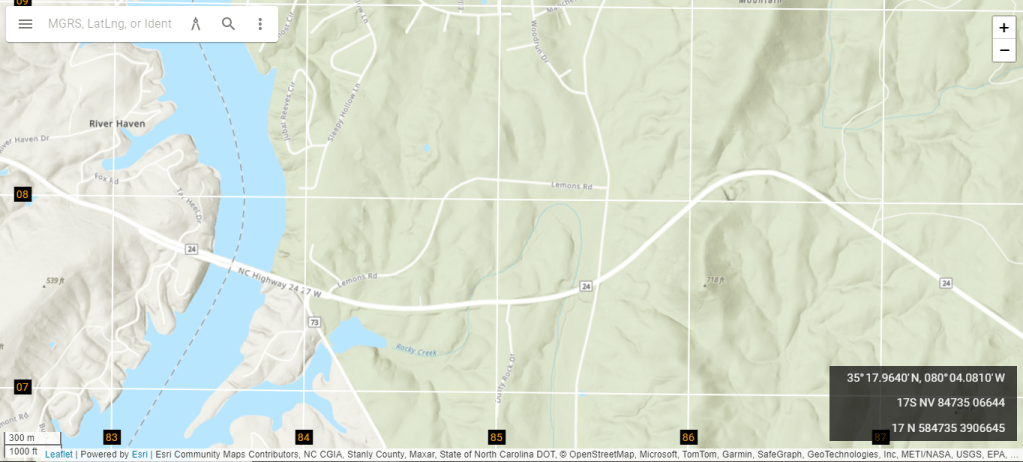
To add a marker, click on the location where it will be placed. A bubble appears with detailed coordinates in MGRS, UTM, LAT/LONG, and elevation data.
Next click the three dots next to the search bar and select “Add marker”
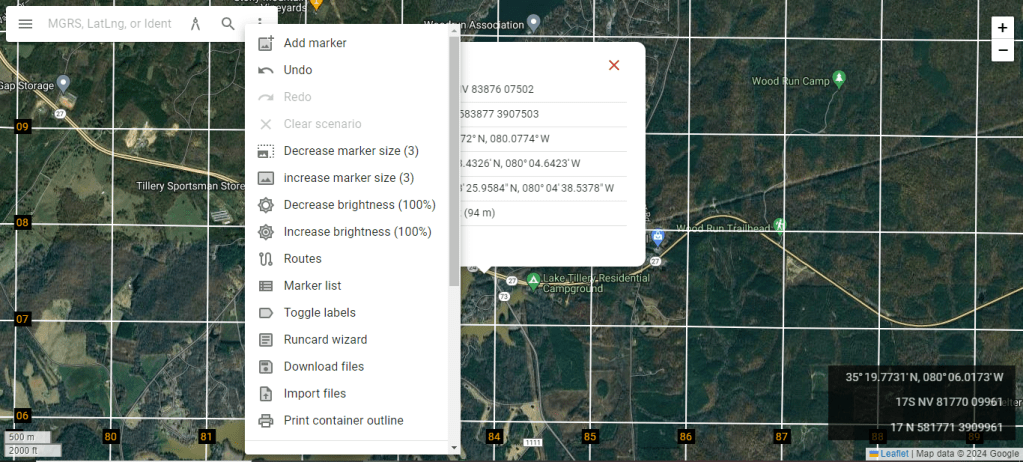
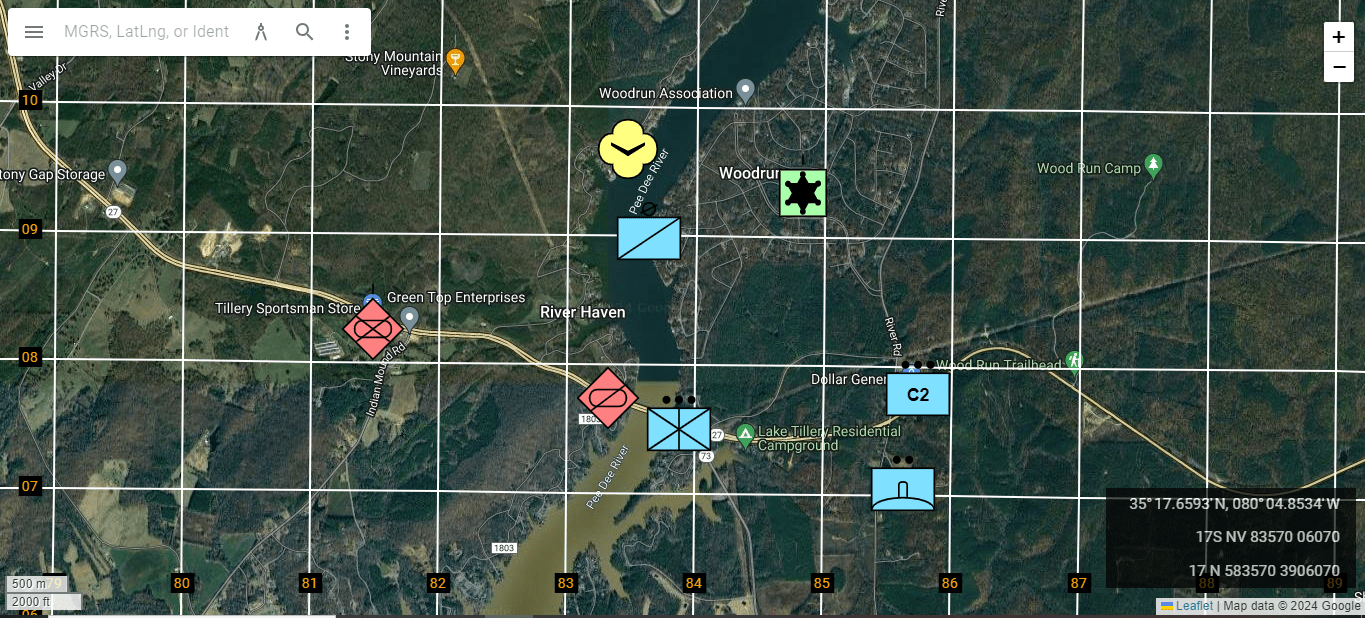
From here you get a pop-up with a series of drop-down menus that make it very easy to create the marker that you want. You can make it a simple or as complicated as you want. When you are done selecting the affiliation, echelon (size), and composition to get the symbol you desire, it will appear on the map when you click on the desired symbol. In the example below, I have placed a marker for a friendly platoon of motorized infantry guarding the bridge.
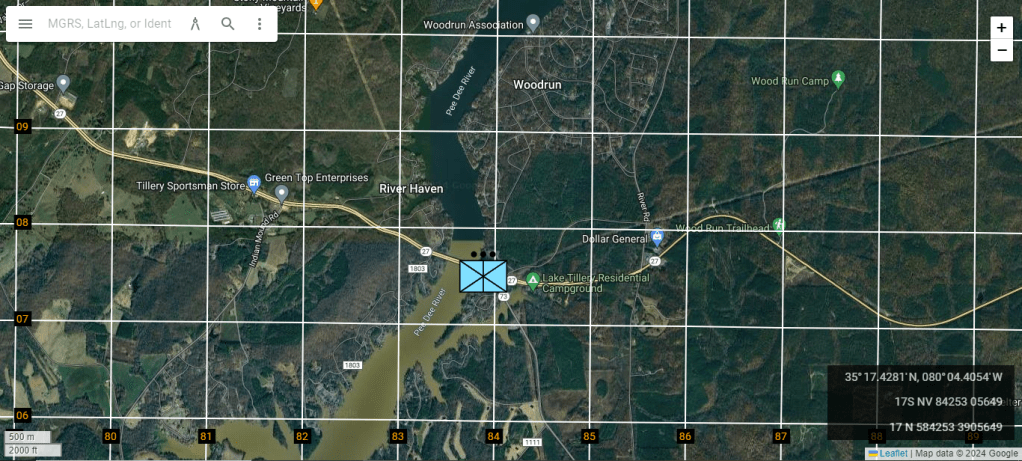
You can then repeat this process for hostile, neutral, or other units. This is an excellent tool for Intelligence Preparation of the Battlespace (IPB), as you can create a very easy-to-understand picture of the forces present in your area. Simply screenshot any maps you make and print them off to hand out to your people.

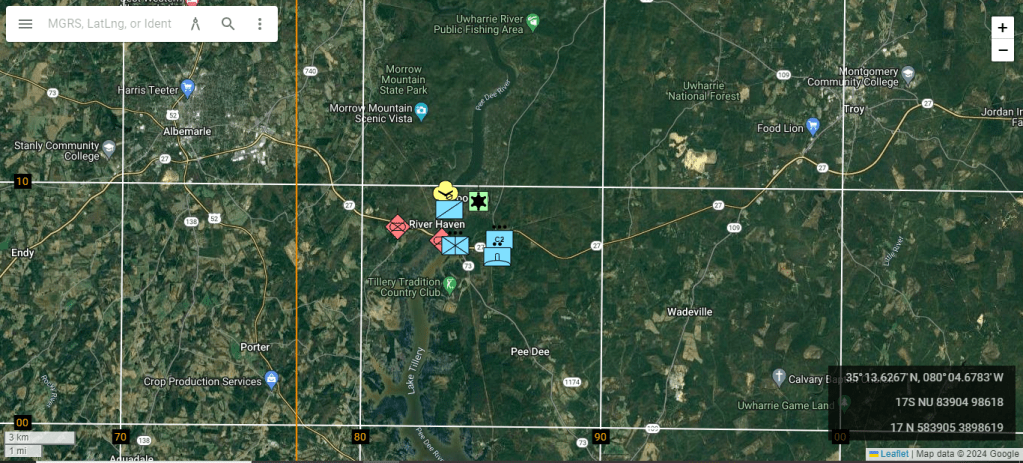
Let’s say you want to zoom out for a bigger picture. the symbols remain the same size as you do, so they can get a bit cluttered. Fortunately, you can adjust the marker size easily. Click on the three dots by the search bar and select “Decrease Marker Size” until the map is no longer cluttered.

Making Usable Tactical Maps
It is possible to use this site to create and print maps that can greatly aid us in specific operations. Unfortunately, it is not yet possible to directly print maps off of the website in a scale that can be used with common map protractors (1:24,000, 1:25,000, etc.), and I have not yet found a work-around by fiddling with printer settings.
That said, hawg-ops is still VERY potent when used to supplement a legitimate topographical map purchased from mytopo.com. The biggest asset that hawg-ops provides is grid lines overlaid upon satellite imagery. Sat imagery can see things of tactical importance that we would otherwise miss on a topo map. Treelines, buildings, small water features, cover and concealment, etc. The grid lines allow us to quickly line up what we see on both maps.
Additionally, with hawg-ops, you can zoom in to create maps of a MUCH smaller scale than you could ever find elsewhere. The following steps are how I would make a tactical map sheet if I was a squad leader in this sample AO.
Note that this is to SUPPLEMENT, not replace, my 1:24,000 scale topographical map.
First, we get rid of all unit markers. Those are fine for powerpoint slides or intelligence briefs, but they get in the way of actual navigation. Clear markers by either refreshing the page or selecting “Clear scenario” from the drop-down menu.

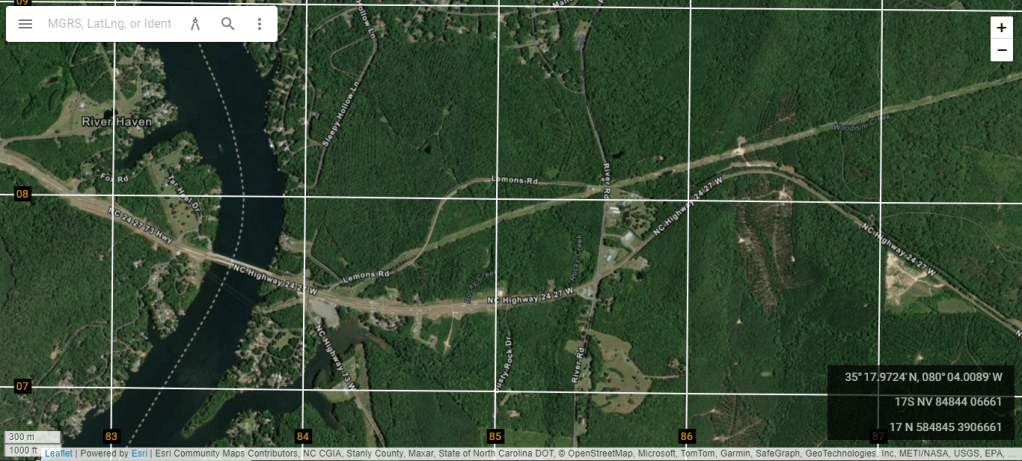
Next, I want to center the map on my AO and include key terrain around my position/objective. The bridge is my objective, but I want to include the opposite bank and the town to my North. I don’t anticipate going to the opposite bank, so I don’t need too much detail of the West side of the river.

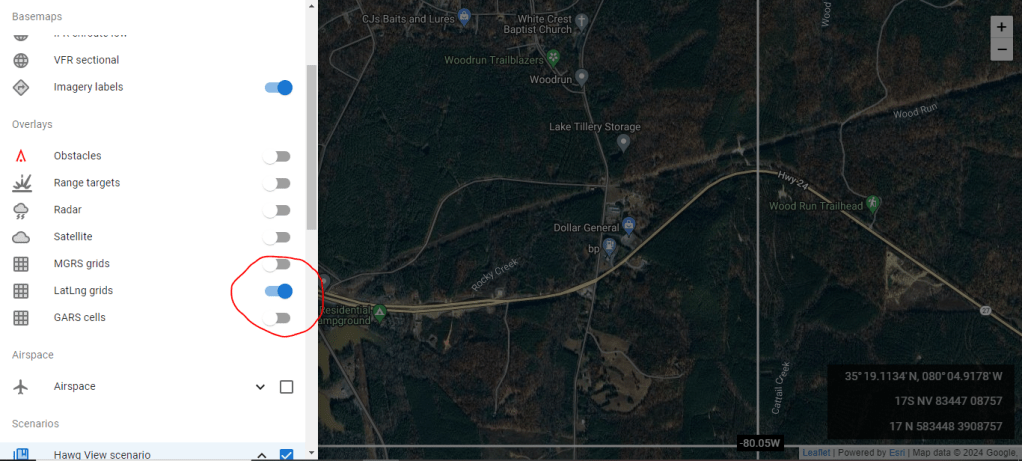
Next, I need to ensure that my grid lines match the grid system on my topographical map. If my topo map uses lat/long (gross), I need to access the drop-down menu in the top left and select the appropriate button.
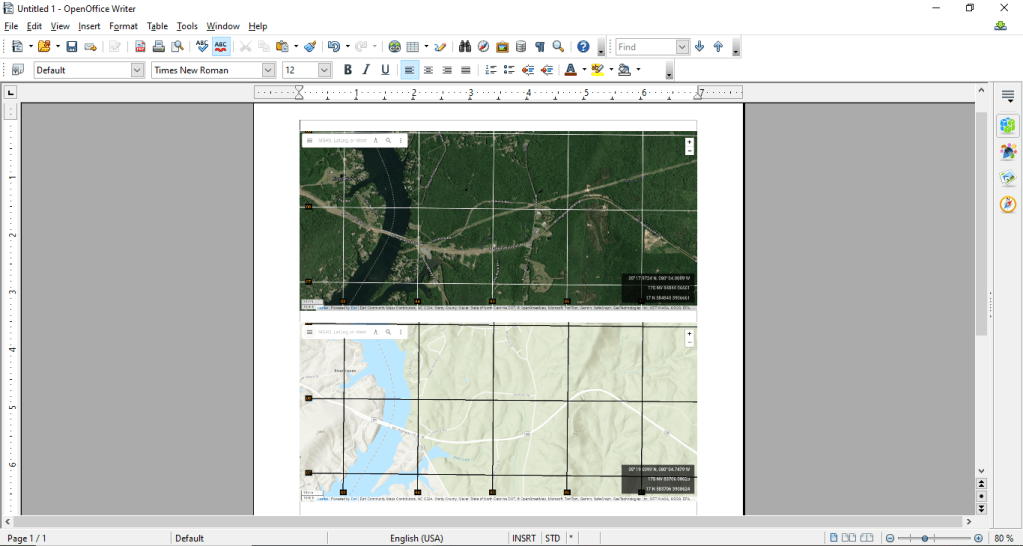
Next, I’m going to open a text document (MS Word, OpenOffice, etc.). I will immediately screenshot the map using the snipping tool and copy it into the document.

Now, back to hawg-ops. You have access to several different base maps in the drop down menu. The only ones useful for our purposes are Google Hybrid (default), ESRI Imagery, and ESRI Topographic. Switching to ESRI Imagery gets us a slightly different view than Google Hybrid. This imagery is taken with a different satellite, often during a different time of year, so you get a different view of the foliage and a slightly better understanding for how the area might look on the ground.
Switching to ESRI Topographic trades the imagery for a topographic 3D-ish view of the same area. It doesn’t show contour lines, but uses shading and elevation marks to show the terrain.
Take screenshots of the same area viewed under each base map and copy/paste them into your word document. It should look something like this.

We now have 3 different views of the same area side-by-side. What I most often do is compare the Google Hybrid with the ESRI imagery and choose whichever one gives me a better understanding of the area, and then delete the other one. You could keep both if you want, but I prefer to have only one satellite image next to the topo image.
You may notice that the grid lines are hard to see in ESRI topographic. They’re white regardless of what base map you select. What I like to do is open the ESRI topographic image with Paint 3D and draw black grid lines over the white so that I can see them more easily.
And there you have it. Print off your tactical map sheet and laminate it. If desired, you can add marginal data underneath about the AO, or you can just cut off the extra white paper before laminating to make it more compact.
Amazon Affiliate link: https://amzn.to/3U0aznZ
Summary
Hawg-ops.com is an excellent free map tool. It was designed by “Porkins”, a military pilot, to make mission planning easier for himself and his fellow pilots. He is out of the military now, but still updates the website from time to time. He gets no money from it and manages the site as a hobby, so updates are slow in coming. However, what he has created is still extremely useful and you would be wise to take advantage of its features as I have shown here.
There is likely much more to this website that I haven’t discovered yet, so I may yet write a Part 3 if I discover more features useful to the modern American rifleman.
In the meantime, if you haven’t already, check out the articles I wrote on battle tracking and setting up a map board. It would be wise to begin buying/making maps of your area now while you still can. Access to the internet is never guaranteed, especially not when you’re likely to need maps.
